

Most outdoor light fixtures fail early not because of electrical faults, but because dirt, moisture, and oxidation were left to work on their surfaces season after season. This guide walks through the safe cleaning process step by step, then goes deeper than most guides do: how to treat each material correctly, how to reverse oxidation, and how to build a maintenance routine that keeps fixtures working for years.
The Fastest Safe Way to Clean Outdoor Light Fixtures
If you only remember one routine, make it this one. Turn off the power at the breaker and wait until the fixture is cold to the touch. Brush away loose dirt, cobwebs, and insect debris with a dry soft-bristled brush. Wash the fixture with a cloth dipped in warm water and a few drops of mild dish soap, wrung out well. Clean glass or plastic covers separately with glass cleaner, inside and out. Wipe everything with a clean damp cloth to remove soap, then dry every part completely before reassembling and restoring power. For a standard wall lantern, the whole process takes about 15 minutes.
That routine covers roughly 80% of situations. The remaining 20% is where fixtures actually get ruined: using the wrong cleaner on the wrong metal, scrubbing oxidation with abrasives, or letting water reach sealed electrical parts. The sections below cover exactly those cases.
Before You Touch the Fixture: Power, Weather, and Supplies
Cut power at the circuit breaker, not just the wall switch, because switched-off fixtures on shared circuits can still carry current. If the lights were on recently, wait until every surface is cold; warm glass can crack on contact with cold water, and warm metal reacts unpredictably with cleaning solutions. Pick a dry, calm day so parts dry fully before evening moisture arrives.
Supplies for a full cleaning session: mild dish soap, a bucket of warm water, microfiber cloths, a soft-bristled brush, glass cleaner, rubber gloves, and a stable ladder for fixtures mounted above reach. For material-specific jobs you may add white vinegar, baking soda, car wax, and a metal polish matched to your fixture's finish, all of which are covered below.
Step-by-Step Cleaning Process
- Remove detachable parts such as shades, covers, and decorative caps, keeping screws in a small container so nothing rolls into the grass.
- Dry-clean first: brush away loose dirt, cobwebs, and insect nests, paying attention to crevices, vents, and the top surface where debris settles.
- Mix warm water with a small amount of mild dish soap. Skip harsh chemicals entirely at this stage regardless of material.
- Wipe the fixture body with a well-wrung soft cloth. For stuck-on grime, hold the damp cloth against the spot for a minute to loosen it instead of scrubbing harder.
- Clean glass covers with glass cleaner and a lint-free cloth, treating both the inside and outside surfaces, since the inner face collects a film from heat and insects.
- Wipe bulbs with a barely damp cloth, keeping the screw base and any electrical contact completely dry, and replace burnt-out bulbs while the fixture is open.
- Go over every washed surface with a clean damp cloth to lift soap residue, which otherwise leaves streaks and attracts new dirt faster.
- Dry every component fully with a dry cloth. Trapped moisture is the single biggest cause of post-cleaning corrosion and electrical trouble.
- Reassemble, tighten fasteners snugly without over-torquing, and restore power.
Cleaning by Material: Why Brass, Bronze, and Black Fixtures Need Different Care
Outdoor fixtures fail cosmetically in material-specific ways. Brass tarnishes, copper patinates, powder-coated black fades and scratches, and plastic yellows under UV. A cleaner that restores one material can permanently damage another, so identify what you own before reaching past soap and water.
Brass Fixtures: Check for Lacquer Before Anything Else
Brass ships in two states, and the difference decides your entire approach. Lacquered brass carries a clear protective coating; it only ever needs soap, water, and a soft cloth, because polish or acidic cleaners will eat through the lacquer and leave permanent blotches. Unlacquered brass tarnishes naturally as the copper in the alloy reacts with oxygen and sulfur in the air, and it can be brought back with a dedicated brass polish or, for light tarnish, a paste of lemon juice and baking soda tested first on a hidden spot.
The quick test: put a drop of polish on an inconspicuous area. If nothing changes, the surface is lacquered. After polishing unlacquered brass, rinse, dry completely, and apply a thin layer of car wax; the wax repels water and slows the next tarnish cycle noticeably on fixtures exposed to rain.
Copper and Bronze: Decide Whether the Patina Stays
Copper and bronze develop patina, the green-brown surface layer formed as the metal reacts with air and moisture. Unlike rust on steel, patina is protective: it seals the metal underneath from further corrosion, which is why architects often specify it deliberately. So the first decision is whether you want it gone at all. To keep the patina, clean only with mild soap and water. To remove it and return to bright metal, use a commercial copper cleaner or a vinegar-and-salt solution, understanding that the surface will begin patinating again immediately unless you seal it with wax or lacquer afterward.
Oxidized and Rusted Fixtures: Restoration, Not Just Cleaning
White chalky bloom on aluminum, dull grey film on steel, and orange rust are all oxidation, and they respond to a restoration sequence rather than a wipe-down. Start by washing off dirt so you can see the actual damage. Treat the oxidized areas with white vinegar applied on a cloth and left for 10 to 15 minutes; the mild acid dissolves oxide without attacking sound metal. Rub with a non-abrasive pad, repeating on stubborn spots. Very fine 0000-grade steel wool is acceptable only on bare, unpainted, uncoated metal and only with light pressure; on any painted or powder-coated surface it will cut through the finish and make the corrosion worse within months.
After the oxide is off, rinse, dry completely, and protect the surface with automotive wax or a clear metal sealer. Skipping the protection step is why restored fixtures often look worse a year later than they did before restoration: cleaning removed the oxide layer that, however ugly, was slowing further attack. In coastal areas, where salt accelerates the electrochemical reaction behind all of this, plan to renew the protective layer twice a year.
Black and Powder-Coated Fixtures: Protect the Finish, Not the Metal
Modern black outdoor fixtures are usually powder-coated, meaning the color is a baked-on polymer layer rather than paint. The coating is tough but not scratch-proof, and once breached it lets moisture reach the metal beneath. Clean with soap, water, and soft cloths only; never abrasives, never solvent cleaners, which dull the finish. Sun-faded black can be revived with a dedicated powder-coat restorer or a light application of automotive polish made for painted surfaces. Touch up chips promptly with matching exterior enamel to keep water out of the wound.
Plastic Covers and Diffusers: Reversing the Yellow
Polycarbonate and acrylic covers yellow under UV exposure, cutting light output well before the bulb weakens. Clean them with mild soap and water; ammonia-based glass cleaners cause micro-cracking (crazing) in many plastics and should stay away from them entirely. Mild yellowing often responds to gentle buffing with a baking soda and water paste. Deep, brittle yellowing is chemical degradation of the plastic itself and does not reverse; at that point a replacement diffuser restores more light than any cleaning can.
Glass Shades and Panels
Glass is the forgiving material: glass cleaner and a lint-free cloth handle nearly everything. Clean both faces, since the inner surface collects a haze from heat and trapped insects that quietly dims the fixture. Seeded and textured glass needs a soft brush to lift dust from the texture before wiping. If hard-water spots have etched into the glass from sprinkler overspray, a 1:1 white vinegar and water solution dissolves the mineral deposits.
Cleaning by Fixture Type
Wall-mounted fixtures. The critical zone is where the fixture meets the wall. Keep water away from that junction, clean the top surface where debris accumulates, and use the session to check the mounting plate, the gasket, and the wiring entry for wear. Fixtures like the Large Modern Outdoor Wall Lights put the glass panel front and center, so the inside-and-outside glass routine makes a visible difference here. Browse the full wall lights collection if you are pairing cleaning with an upgrade.

Geometric designs with angled panels, such as the Geometric Outdoor Wall Mount Light Fixture, collect dust along every edge and facet, so run the soft brush along each seam before the damp-cloth pass.

Solar fixtures. The panel is the priority: even a thin film of dust measurably cuts charging, so wipe panels monthly with a damp cloth, never anything abrasive. Clean the light sensor and any motion sensor at the same time, since a dirty sensor keeps the light on or off at the wrong times. On models such as the Radya Solar Wall Light, check the seals after heavy rain, and on adjustable designs like the Extendable Solar Outdoor Wall Lights, clean the extendable arm and give moving joints an occasional touch of silicone-based lubricant. Our guide to solar-powered outdoor lights covers panel placement, which matters as much as panel cleanliness.

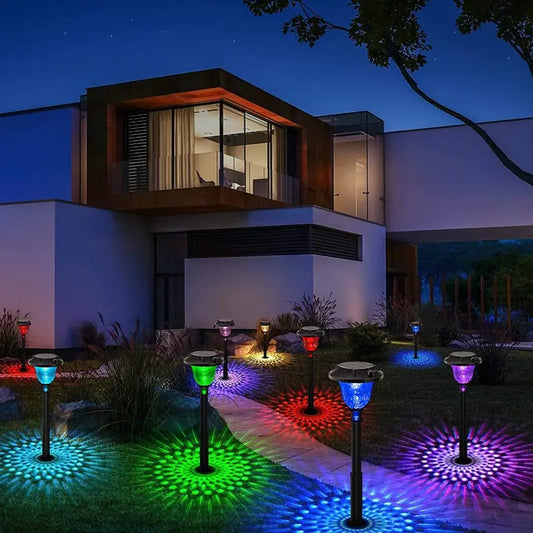
Landscape and ground lights. These live closest to dirt, mulch, and irrigation, so start by clearing vegetation and debris from around each head. Clean lenses thoroughly, confirm drainage holes are open, and make sure soil or mulch has not crept over the fixture body, which traps heat and moisture. LED heads like the Zenlum LED Landscape Lights mainly need clear lenses and an annual wiring check, while solar color models such as the Solar RGB Landscape Lights add a panel wipe to the same routine.

String lights. Unplug them, wipe each bulb and the cable run with a barely damp cloth, and check every socket for water or insect intrusion while you work down the line. Cracked sockets and stiff, sun-hardened cable insulation are replace-now signals, not clean-around problems.
Outdoor Lighting Maintenance: The Schedule That Prevents Repairs
Cleaning removes what has already accumulated; maintenance stops small problems from becoming fixture-killers. The difference shows up in lifespan: a maintained fixture routinely outlives an ignored identical one by years, because the failure points outdoors are predictable — seals, connections, and corrosion — and all three are catchable early.
Monthly, 5 minutes: a walk-around at night. Note any fixture that flickers, sits dark, or looks dimmer than its neighbors, and wipe solar panels.
Seasonally, with each deep clean: tighten mounting screws and check that fixtures have not loosened in wind; inspect gaskets and seals for cracking; look for the first signs of oxidation at joints and fastener heads, where it always starts; confirm ground-level fixtures still drain.
Annually: inspect visible wiring and connections for chafing, UV-brittle insulation, or corrosion at the contacts; renew wax or sealer on protected metal; re-aim landscape heads that plants or frost have shifted; and evaluate whether bulb output still matches the area's needs, using our guide to how many lumens outdoor lighting needs as the benchmark.
After storms: a quick pass for physical damage, water inside covers, and debris on fixtures, since a cracked cover left through one rainy week can finish off the socket behind it.
Material Cleaning Reference Table
| Material | Safe Cleaner | Never Use | Protect With | Deep-Clean Frequency |
|---|---|---|---|---|
| Lacquered brass | Mild soap and water only | Polish, acids, abrasives | Existing lacquer, keep intact | Twice a year |
| Unlacquered brass | Brass polish; lemon and baking soda paste | Steel wool, bleach | Thin car wax layer | Twice a year plus spot polish |
| Copper / bronze | Soap and water; copper cleaner if removing patina | Abrasive pads on patina you want to keep | Wax or lacquer after brightening | Twice a year |
| Oxidized aluminum / steel | White vinegar soak, non-abrasive pad | Coarse steel wool, wire brushes on coated metal | Automotive wax or clear sealer | Restore once, then maintain seasonally |
| Black / powder-coated | Mild soap and water | Solvents, abrasives, pressure washers | Powder-coat restorer; enamel touch-up on chips | Twice a year |
| Plastic covers | Mild soap; baking soda paste for yellowing | Ammonia-based glass cleaners | Shade from direct UV where possible | Twice a year |
| Glass | Glass cleaner; vinegar solution for water spots | Cleaning while warm | Nothing needed | Twice a year, both faces |
The Mistakes That Ruin Fixtures
Nearly every cleaning-related fixture death traces back to one of these: spraying water directly into the housing, which finds its way past seals into wiring; pressure washing, which forces water into places rain never reaches; abrasive pads on coated or polished surfaces; mixing cleaning chemicals, which can produce harmful fumes and etch finishes; cleaning warm fixtures; and over-tightening screws on reassembly, which strips threads and cracks plastic. Manufacturer care instructions override any general advice here, since some finishes carry coatings with their own requirements.
Frequently Asked Questions
How often should you clean outdoor light fixtures?
Deep clean twice a year, ideally spring and fall, with monthly quick wipes for solar panels and a brief check after major storms. Homes near the coast, under heavy tree cover, or beside dusty roads benefit from adding a third cleaning, since salt, sap, and dust all accelerate surface damage.
What is the best way to clean outdoor light fixtures?
Cut power at the breaker, brush off loose debris dry, wash with mild soap and warm water on a soft cloth, clean glass separately with glass cleaner on both faces, rinse with a clean damp cloth, and dry everything completely before reassembly. Match any stronger cleaner to the specific material before using it.
How do you remove oxidation from outdoor light fixtures?
Wash the fixture first, then apply white vinegar on a cloth to the oxidized areas for 10 to 15 minutes and rub with a non-abrasive pad. Repeat on stubborn spots, rinse, dry fully, and seal the cleaned metal with automotive wax or a clear sealer so the oxidation does not return within months.
Can you use vinegar on brass light fixtures?
Only on unlacquered brass, briefly and diluted, followed by a thorough rinse. On lacquered brass the acid attacks the protective coating and leaves permanent dull patches, so lacquered surfaces should see nothing stronger than mild soap and water.
Can I pressure wash outdoor light fixtures?
No. Pressure washers force water past gaskets and seals into electrical housings that ordinary rain never penetrates, and the jet can strip powder coating and paint. Hand washing with a soft cloth is the safe method for every fixture type.
Why do my outdoor lights look dim even with new bulbs?
The usual causes are a film of grime on the inner face of the glass, yellowed plastic diffusers, or dirty solar panels on solar models. Cleaning the inside of covers and replacing deeply yellowed diffusers typically restores more brightness than changing the bulb again.
Wrapping Up
Clean fixtures are brighter, safer, and dramatically longer-lived, and the work divides neatly into a universal soap-and-water routine plus a handful of material-specific treatments. Match the cleaner to the metal, seal what you restore, and let the seasonal schedule catch problems while they are still five-minute fixes. For related care guides, see our walkthrough on maintaining indoor chandeliers, and if any fixture is past saving, our outdoor lights collection covers wall, ground, and solar replacements built for the weather they will live in.


