

Installing an outdoor light fixture is a manageable DIY project that takes 1-2 hours when you follow the correct safety procedures, wiring methods, and surface-specific mounting techniques. This complete 2026 guide covers step-by-step installation for brick, siding, stucco, and replacing existing fixtures — with NEC code references, IP ratings, and cost breakdowns for US residential applications.
Tools and Materials Required
| Category | Items | Purpose |
|---|---|---|
| Essential Tools | Phillips and flathead screwdrivers; wire strippers; non-contact voltage tester; drill with bits (masonry for brick/stucco) | Core installation toolkit |
| Safety Equipment | Safety glasses; work gloves; sturdy ladder; circuit breaker lock-out tag | Personal protection |
| Mounting Hardware | Wire nuts (twist-on connectors); electrical tape; mounting screws; masonry anchors (Tapcon for brick); siding mounting block (for lap siding) | Secure attachment |
| Weatherproofing | Exterior-grade silicone caulk; caulk gun; weather-resistant wire nuts; UV-stabilized electrical tape | Water intrusion prevention |
| Measuring & Layout | Tape measure; carpenter level; pencil for marking | Accurate positioning |
| Electrical Components | Weatherproof outdoor electrical box (if needed); outdoor-rated UF cable (not standard indoor Romex NM-B); IP44+ rated fixture | Code-compliant electrical |
Safety Preparation — The Non-Negotiable First Step
- Turn off power at the circuit breaker. Locate the breaker controlling the outdoor circuit; switch to "off" position. Apply a lock-out tag if working alone in a house with multiple occupants.
- Verify power is off using non-contact voltage tester. Test all wires at the existing fixture location BEFORE touching them. Voltage testers cost $10-20 and prevent fatal electrical shock.
- Wear safety equipment. Safety glasses protect eyes from drilling debris and falling fixtures; gloves provide grip and protect hands from sharp wire ends and screws.
- Use a stable ladder positioned correctly. Place ladder on flat ground; extend 3 feet above working surface; maintain 3-point contact (two hands + one foot, or two feet + one hand) throughout work.
- Work with a helper for substantial fixtures. Fixtures weighing over 10 lbs benefit from a helper supporting weight while you connect wires and secure to mounting bracket.
- Verify weather conditions. Never install outdoor electrical fixtures during rain, snow, or high humidity. Moisture during installation creates electrical hazards and prevents proper caulk curing.
- Check local building codes. Some jurisdictions require electrical permits for new fixture installations (replacing existing fixtures typically exempt). Verify before starting; permits cost $25-150 typical.
The 10-Step Installation Process
-
Turn off power and verify with voltage tester
Locate the circuit breaker controlling the outdoor circuit; switch to "off". Use non-contact voltage tester at the fixture location to confirm power is genuinely off. Test all wires (hot, neutral, ground) individually.
-
Remove the old fixture (if replacing)
Loosen the two mounting screws holding the fixture to the wall plate. Support the fixture weight as you pull it away from the wall. Disconnect wires by loosening wire nuts counterclockwise. Note wire connections before disconnecting (take photo for reference).
-
Inspect the existing electrical box
Check the existing weatherproof box for cracks, corrosion, water damage, or loose mounting. Replace box if damaged. Verify box is rated for outdoor wet location use (look for "WET" or "DAMP" rating stamp).
-
Install new electrical box (if needed)
For new installations or damaged box replacement: position weatherproof box; mark mounting holes with pencil; drill pilot holes (masonry bit for brick/stucco; standard bit for wood siding); install masonry anchors if needed; secure box with appropriate screws.
-
Run cable through the electrical box
Pull outdoor-rated UF cable through cable entry of the electrical box; leave 6-8 inches of cable extending into box for connections. Apply cable clamp if box requires it (most outdoor boxes include integrated clamps).
-
Strip wire ends and prepare connections
Strip approximately 5/8 inch of insulation from each wire end using wire strippers (not knife — damages copper). Twist the bare copper ends to consolidate strands. Have wire nuts ready for connection.
-
Connect wires by color matching
Connect wires color-to-color: Black to black (hot/live); White to white (neutral); Bare copper or green to ground. Twist matching wire ends together clockwise; cap with appropriate-size wire nut twisting clockwise until snug.
-
Secure connections and tuck into box
Pull gently on each wire nut to verify secure connection. Wrap each wire nut with electrical tape for additional security and moisture protection. Carefully fold wires into electrical box; do not pinch wires between box and fixture.
-
Mount fixture to bracket
Attach fixture mounting plate or bracket to electrical box using provided hardware. Hold fixture in position; align with mounting holes; secure with screws. Verify fixture is level (use carpenter level horizontal across fixture).
-
Apply weatherproof caulk and restore power
Apply continuous bead of exterior-grade silicone caulk around top and both sides of fixture base. Never caulk the bottom edge — leaves drainage path for any water intrusion. Allow caulk to cure 24 hours minimum before exposing to rain. Restore power at circuit breaker; test fixture operation.

Installing Outdoor Light Fixture on Brick
Brick Installation
Brick installation requires masonry-specific anchors and drilling techniques. Standard wood screws will not hold securely in mortar joints or brick face. Brick-specific installation steps:
- Use masonry drill bit appropriate to brick type. Hammer drill function recommended for hard brick; standard rotary drill acceptable for softer brick. Use carbide-tipped masonry bit.
- Drill into mortar joints when possible. Mortar holds anchors more reliably than brick face; allows easier future removal. Drill at mortar joint intersections for strongest anchor.
- Install masonry anchors before mounting. Tapcon screws (concrete screws) drive directly into pilot holes; plastic masonry anchors require slightly larger pilot hole; both rated for outdoor wet location use.
- Drill pilot holes to anchor depth. 1/4 inch diameter pilot hole 1.5-2 inches deep for typical Tapcon screws; verify with anchor manufacturer specifications.
- Apply silicone caulk thoroughly. Brick surface texture creates more potential water intrusion paths than smooth siding. Apply continuous bead of exterior silicone around top and both sides of fixture base.
- Inspect annually for caulk degradation. Brick installations require yearly caulk inspection and reapplication; brick surface flex from temperature changes degrades caulk faster than smoother surfaces.
Installing Outdoor Light Fixture on Siding
Siding Installation (Vinyl, Wood, Fiber Cement)
Lap siding (vinyl, wood, fiber cement) presents the challenge of an angled surface — direct fixture mounting on lap siding creates gaps and tilts the fixture. The mounting block solution:
- Use a siding mounting block. Plastic mounting blocks ($10-25 typical) have notches matching siding profile, providing flat surface for fixture mounting. Match block size to siding profile (4-inch and 5-inch profiles most common).
- Position mounting block over existing or new electrical box. Center block over box; verify with painter's tape template before drilling.
- Secure mounting block with exterior-grade screws. Drive screws through siding into wall studs or sheathing. Avoid driving screws into hollow channels behind vinyl siding.
- Apply silicone caulk between block and siding. Creates watertight seal preventing rain from penetrating behind block. Use exterior-grade silicone caulk only.
- Mount fixture to flat block surface. Fixture sits straight and level on flat mounting block; eliminates tilt issues of direct lap siding mounting.
- Special consideration for wood siding. Wood siding can be drilled directly without mounting block, but verify behind siding for stud location. Avoid mounting into hollow areas between studs.
- Caulk all gaps thoroughly. Inspect entire perimeter for gaps; apply continuous caulk bead top and both sides; leave bottom edge open for drainage.
Installing Outdoor Light Fixture on Stucco
Stucco Installation
Stucco installation combines aspects of brick (masonry anchors required) with unique considerations (stucco cracks easily under stress). Stucco-specific principles: drill with light pressure to avoid cracking stucco face; use plastic masonry anchors rather than aggressive Tapcon screws when possible; apply flexible caulk (silicone or polyurethane) to accommodate stucco's natural movement; inspect annually for caulk cracks and stucco damage around fixture; consider larger fixture base if filling cracks or covering damaged area.
Replacing an Existing Outdoor Fixture
Replacing Existing Fixture (Simplest Installation)
Replacing an existing outdoor light fixture is the most beginner-friendly outdoor electrical project — no new electrical box, no new wiring run, no surface modification. Replacement-specific steps:
- Turn off power at circuit breaker. Always first step regardless of project type.
- Verify power off with voltage tester. Test at existing fixture wires before disconnecting anything.
- Cut existing caulk seal with utility knife. Run blade carefully around fixture base where it meets wall; this releases the caulk seal allowing fixture removal.
- Remove existing fixture mounting screws. Loosen two mounting screws holding fixture to electrical box; support fixture weight as you pull from wall.
- Disconnect wire nuts and document connections. Take photo before disconnecting; loosen wire nuts counterclockwise; pull wires apart gently.
- Inspect electrical box. Check for water damage, corrosion, or cracks; replace box if damaged (rare — most existing boxes still functional).
- Compare new fixture base size to existing. If new fixture base is smaller than old caulk line, spackle and paint exposed area before installing new fixture. If new fixture base is larger, no preparation needed.
- Wire and mount new fixture. Connect wires color-to-color matching (black-to-black, white-to-white, ground-to-ground); secure with wire nuts; mount to existing box.
- Apply fresh caulk and test. New silicone bead around top and sides; restore power; verify operation.
Installing Porch Light Fixture
Porch lights serve security, welcoming, and architectural illumination purposes — typically positioned beside the front door at eye-level height. Porch light-specific installation considerations:
- Mounting height standard. Center of porch light fixture at 60-72 inches from finished floor (eye level for arriving adult).
- Symmetric pair flanking double doors. If front entry features double doors or sidelights, matched paired sconces flanking the entry are visually optimal.
- Damp-location rating minimum. Most porch lights protected by overhang or porch roof; damp-location rated fixtures acceptable. Fully exposed porches require wet-location rated.
- Motion sensor integration. Modern porch lights commonly include integrated motion sensors providing security functionality without continuous illumination.
- Smart bulb compatibility. Smart bulb integration enables automatic scheduling (illuminate at sunset, off at midnight) and voice control for hands-free arrival.
- Color temperature standard. 2200K-2700K warm white for welcoming residential atmosphere; never 4000K+ (institutional/clinical incompatible with porch hospitality role).
- Coordination with garage door light. If garage door also has wall lantern, coordinate finish and style with porch light for architectural cohesion.
Wiring & NEC Code References
| NEC Code Section | Requirement | Application |
|---|---|---|
| NEC 210.8(A)(3) | GFCI protection required for outdoor receptacles | All exterior 15-20A circuits |
| NEC 314.27 | Outlet boxes supporting lighting fixtures rated for fixture weight and use | Box selection criteria |
| NEC 410.16 | Luminaires installed in damp/wet locations marked for that environment | Fixture rating verification |
| NEC 310.10 | Conductors exposed to sunlight must be UV-rated | Outdoor cable specification |
| NEC 110.14 | Wire connectors approved for application and conductor type | Wire nut requirements |
| NEC 300.9 | Raceways in wet locations contain wires rated for wet locations | Outdoor conduit applications |
Weatherproofing & IP Ratings
| IP Rating | Protection Level | Best Application |
|---|---|---|
| IP44 | Protected against water splash from any direction | Covered porches, protected entries, overhang-shielded |
| IP54 | Dust-protected; splash water resistant | Partially exposed locations |
| IP65 | Dust-tight; resistant to water jets from any angle | Fully exposed exterior walls, no overhang protection |
| IP67 | Dust-tight; protected against temporary immersion | Ground-level landscape, areas prone to puddling |
| IP68 | Dust-tight; continuous immersion protected | Submersible applications (pond, pool deck) |
Cost Breakdown — DIY vs Professional
| Installation Type | DIY Cost | Professional Cost | Time Required |
|---|---|---|---|
| Replacing existing fixture | $50-200 (fixture + caulk + wire nuts) | $100-250 (labor) + fixture cost | 30-60 min DIY; 30 min pro |
| New fixture on existing electrical box | $75-250 (fixture + mounting hardware) | $150-400 (labor) + fixture cost | 1-2 hr DIY; 45 min pro |
| New installation with new electrical box (siding) | $150-400 (fixture + box + mounting block + cable) | $300-700 (labor) + materials | 2-4 hr DIY; 1-2 hr pro |
| New installation with new electrical box (brick) | $200-500 (fixture + box + masonry anchors + cable) | $400-900 (labor) + materials | 3-5 hr DIY; 1.5-2.5 hr pro |
| New circuit with new wiring run | Not recommended DIY (requires permit + inspection in most jurisdictions) | $500-1,500+ (labor + materials + permit) | 4-8 hr pro; permit may extend |
| Smart fixture with WiFi integration | $100-400 (smart fixture + standard installation materials) | $150-400 (labor) + fixture cost | 1-2 hr DIY; 45 min pro |
DIY vs Electrician — When to Call Professional
- Replacing existing fixture: DIY appropriate for nearly all homeowners with basic tool skills. Most beginner-friendly outdoor electrical project.
- New fixture on existing box: DIY appropriate if comfortable with wire connections and basic electrical work. Verify electrical box can support new fixture weight.
- New fixture on new electrical box (with existing nearby circuit): DIY possible but requires drilling through exterior wall, running cable, and ensuring wet-location rating throughout. Intermediate skill level.
- New circuit installation: Generally requires licensed electrician. New circuits typically require permit and inspection; circuit breaker panel work involves shock and fire risk; electrical code violations can void homeowner's insurance.
- Knob and tube or aluminum wiring: Always requires electrician. Older wiring types require specialized knowledge and connection techniques.
- Smart home integration with hardwired smart switch: Standard smart bulb + existing fixture = DIY. Smart switch replacement involves work in switch box; intermediate skill level.
- Multiple fixture installation: Single fixture replacement DIY; coordinated multi-fixture installation often benefits from electrician for consistency.
- Permit-required work: Check local jurisdiction requirements; new circuits typically require permits which require licensed electrician in most US jurisdictions.
Common Outdoor Light Installation Mistakes
- Not turning off power at circuit breaker. Single most dangerous installation mistake. Touching live wires causes fatal electrical shock. Always turn off power and verify with voltage tester before touching any wires.
- Using indoor-rated cable outdoors. Standard Romex (NM-B) cable is NOT UV-resistant and degrades when exposed to sunlight. Use outdoor-rated UF cable or run cable through conduit for exterior applications.
- Caulking the bottom edge of fixture. Bottom caulk seal traps water inside fixture and against wall. Always leave bottom edge open for water drainage; caulk top and sides only.
- Skipping mounting block on lap siding. Direct mounting on lap siding creates gaps, tilts the fixture, and provides no watertight seal. Always use siding mounting block for vinyl, wood, or fiber cement lap siding.
- Wrong masonry anchors for brick. Plastic anchors in brick face have limited holding power. Tapcon screws or sleeve anchors recommended for brick installations.
- Wrong IP rating for application. Damp-rated fixtures fail in fully exposed locations (rain damage); wet-rated unnecessary in covered porches but no harm. Match IP rating to exposure level.
- Loose or improper wire connections. Loose connections cause flickering, electrical fires, and fixture failure. Twist wires clockwise; cap with wire nuts twisting clockwise until snug; wrap with electrical tape.
- Forgetting GFCI protection. NEC 210.8 requires GFCI protection for outdoor circuits. Verify outdoor circuit has GFCI breaker or GFCI receptacle protection somewhere upstream.
- Overtightening fixture mounting screws. Excessive torque can crack fixture base, damage mounting hardware, or strip threads in electrical box. Tighten until snug, then quarter-turn additional.
- Wrong wire connection (color mismatching). Black-to-white connections create dangerous reverse polarity. Always connect color-to-color: black-to-black, white-to-white, ground-to-ground.
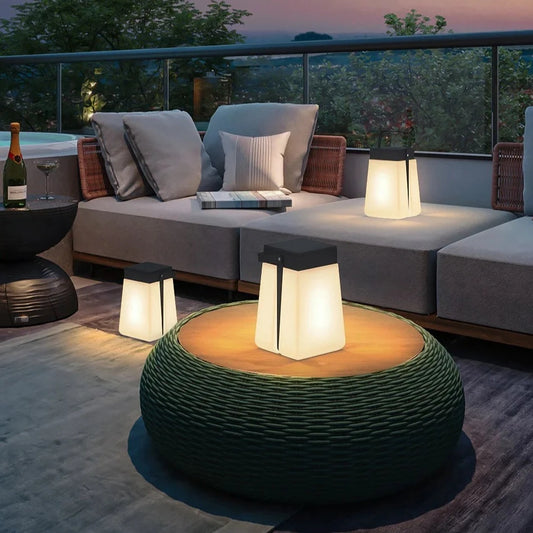

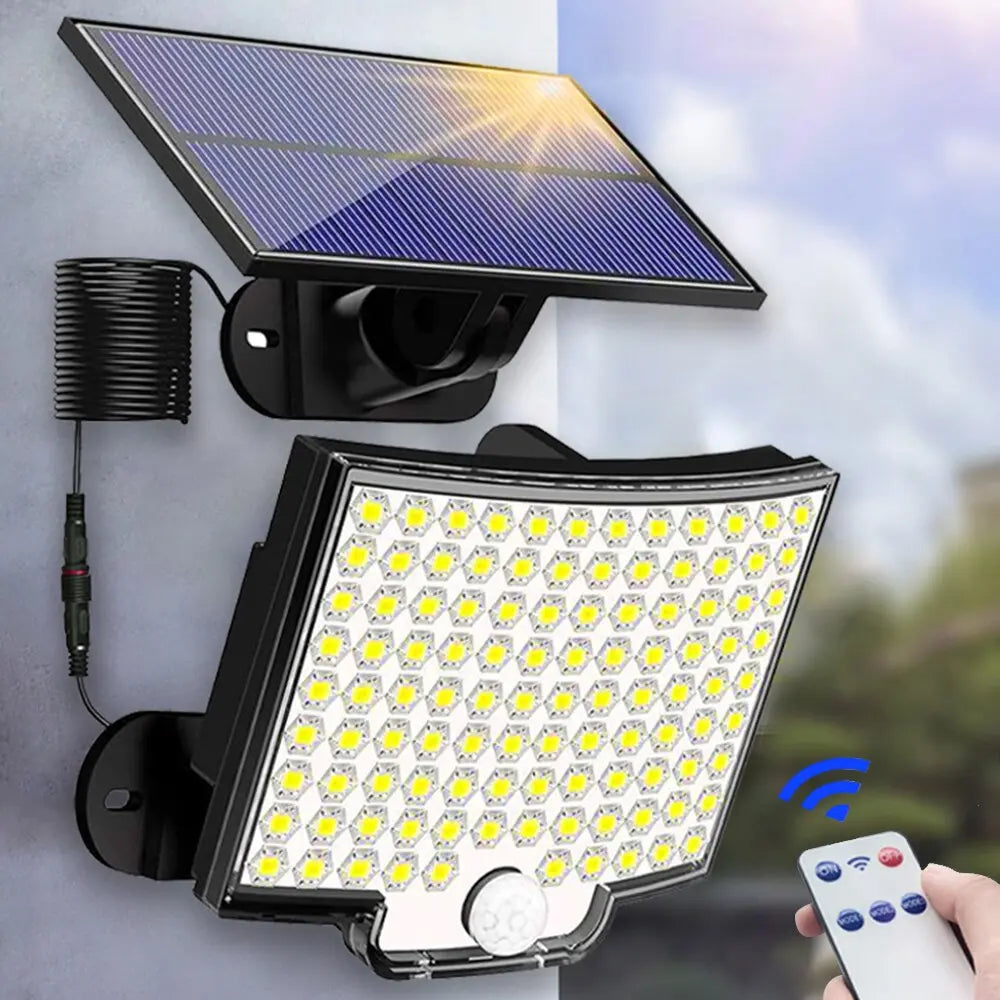
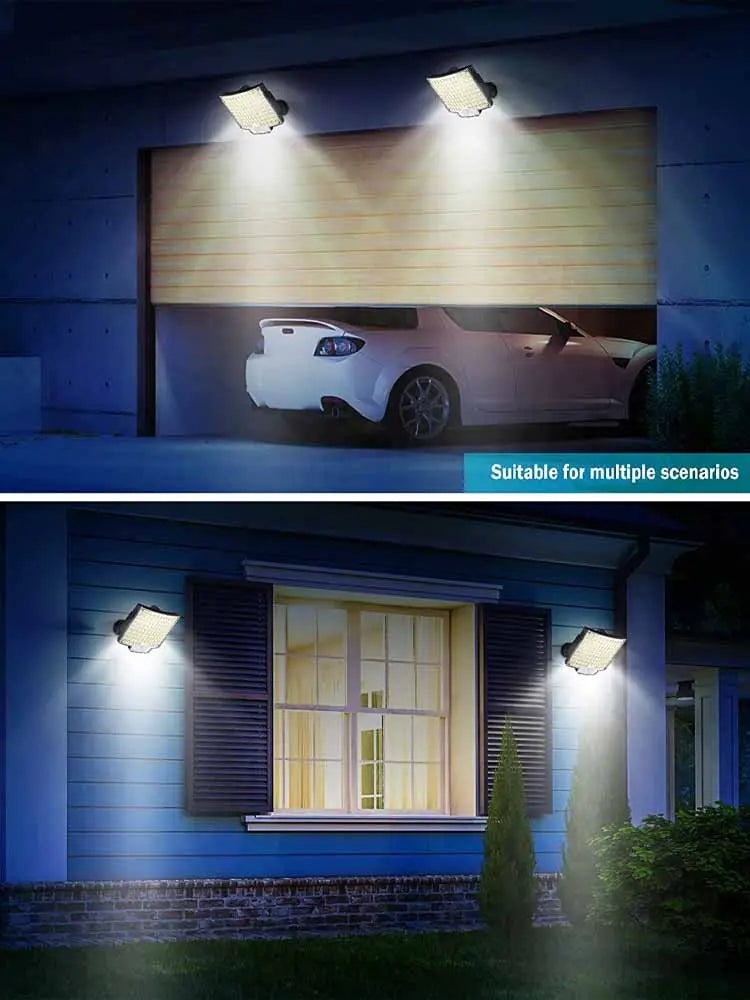
Solar-powered alternatives like the Santa's Decorative Outdoor Solar LED Light and Alessa Portable Solar Lawn Lamp eliminate the electrical work entirely — ideal for areas where running cable proves impractical or for homeowners avoiding electrical installation.
Browse Seus Lighting's outdoor-focused collections — outdoor lights for wall lanterns and exterior facade applications, wall lights for symmetric porch and garage door installations, solar lights for no-wiring alternatives, and our custom service for fixtures requiring specific outdoor dimensions or finishes.
Outdoor Lights Wall Lights Solar Lights Custom Service
Frequently Asked Questions
How do you install an outdoor light fixture?
Installing an outdoor light fixture requires 10 essential steps: (1) Turn off power at circuit breaker controlling the outdoor circuit. (2) Verify power off with non-contact voltage tester at fixture location. (3) Remove old fixture if replacing — loosen mounting screws, disconnect wires (note color connections). (4) Inspect electrical box for damage; replace if cracked or corroded. (5) Install new electrical box if needed — use masonry anchors for brick/stucco; mounting block for lap siding. (6) Run outdoor-rated cable through box; strip wire ends 5/8 inch. (7) Connect wires color-to-color — black to black (hot), white to white (neutral), bare/green to ground. (8) Secure connections with wire nuts; wrap with electrical tape. (9) Mount fixture to bracket; verify level. (10) Apply exterior caulk around top and sides (never bottom); restore power; test operation. Time required: 30-60 min for replacement; 1-2 hours new fixture; 2-4 hours new installation requiring electrical box. Cost: $75-200 typical DIY; $150-400 professional installation.
How do you install an outdoor light fixture on brick?
Installing outdoor light fixture on brick requires masonry-specific techniques: (1) Use masonry drill bit with hammer drill function for hard brick; carbide-tipped bit standard. (2) Drill into mortar joints when possible — mortar holds anchors more reliably than brick face; mortar intersections strongest. (3) Install masonry anchors — Tapcon concrete screws drive directly into pilot holes; plastic masonry anchors require slightly larger pilot. (4) Pilot hole specifications — 1/4 inch diameter, 1.5-2 inches deep for typical Tapcon screws. (5) Position electrical box over anchors; secure with screws. (6) Run outdoor-rated cable through box (UF cable; never indoor Romex). (7) Connect wires color-to-color with wire nuts and electrical tape. (8) Mount fixture to box bracket; verify level. (9) Apply exterior silicone caulk generously — brick texture creates more potential water intrusion paths than smooth siding; caulk top and both sides; leave bottom open for drainage. (10) Inspect annually — brick installations require yearly caulk inspection due to surface flex from temperature changes. Time required: 1.5-2.5 hours typical brick installation. Difficulty: intermediate.
How do you install an outdoor light fixture on siding?
Installing outdoor light fixture on siding (vinyl, wood, or fiber cement) requires a siding mounting block to address the angled surface of lap siding: (1) Choose siding mounting block matching your siding profile (4-inch and 5-inch most common); $10-25 typical cost. (2) Turn off power at circuit breaker and verify off with voltage tester. (3) Position mounting block over existing or new electrical box; verify with painter's tape template. (4) Secure mounting block with exterior-grade screws driven into wall studs or sheathing (avoid hollow channels behind vinyl siding). (5) Apply silicone caulk between block and siding for watertight seal. (6) Mount fixture to flat block surface — eliminates tilt issues of direct lap siding mounting. (7) Connect wires color-to-color with wire nuts. (8) Apply continuous caulk bead around top and both sides of fixture base; leave bottom open for drainage. Wood siding alternative: wood siding can be drilled directly without mounting block but verify behind siding for stud location. Time required: 1-1.5 hours typical. Difficulty: beginner-friendly with mounting block.
How do you replace an outdoor light fixture?
Replacing an existing outdoor light fixture is the most beginner-friendly outdoor electrical project: (1) Turn off power at circuit breaker controlling the outdoor circuit. (2) Verify power off with voltage tester at fixture location. (3) Cut existing caulk seal with utility knife around fixture base where it meets the wall. (4) Remove existing fixture mounting screws (usually two screws); support fixture weight as you pull from wall. (5) Take photo of wire connections for reference; disconnect wire nuts counterclockwise; separate wires gently. (6) Inspect electrical box — check for damage; replace only if cracked or corroded. (7) Compare new fixture base size to existing — if new is smaller, spackle and paint exposed area before installing; if larger, no preparation needed. (8) Connect wires color-to-color: black-to-black (hot), white-to-white (neutral), ground-to-ground. (9) Mount new fixture to existing box; verify level. (10) Apply fresh exterior silicone caulk around top and both sides; restore power; test operation. Time required: 30-60 minutes typical replacement. Cost: $50-200 DIY (fixture + materials); $100-250 professional labor + fixture.
How do you install a porch light fixture?
Installing a porch light fixture follows standard outdoor installation steps with porch-specific considerations: (1) Mounting height standard — center of porch light fixture at 60-72 inches from finished floor (eye level for arriving adult). (2) Position relative to door — single porch light typically positioned 6-12 inches from door frame; paired flanking sconces optimal for double doors or sidelights. (3) Weather rating — damp-location rated acceptable for porches with overhang protection; wet-location rated required for fully exposed porches. (4) Color temperature — 2200K-2700K warm white for welcoming residential atmosphere; never 4000K+ (institutional/clinical incompatible with porch hospitality). (5) Motion sensor option — modern porch lights commonly include integrated motion sensors providing security functionality. (6) Smart bulb compatibility — enables automatic scheduling (illuminate at sunset, off at midnight) and voice control. (7) Follow standard installation steps — turn off power, verify with voltage tester, remove old (if replacing), connect wires color-to-color, mount fixture, caulk top and sides, restore power, test. Time required: 30-60 minutes replacement; 1-2 hours new installation. Cost: $75-250 typical porch light installation.
How do you mount an outdoor light fixture?
Mounting an outdoor light fixture involves attaching the fixture to the electrical box through these specific steps: (1) Verify electrical box is securely mounted — box must be properly anchored before fixture mounting (Tapcon screws for masonry; standard screws for wood; mounting block for lap siding). (2) Attach mounting bracket to electrical box using bracket screws provided with fixture. (3) Connect wires color-to-color before mounting fixture — work in box space with wires extended. (4) Carefully fold connected wires into electrical box; do not pinch wires between box and fixture during mounting. (5) Position fixture against wall; align with mounting bracket. (6) Insert and tighten mounting screws — typically two screws holding fixture to bracket; tighten until snug, then quarter-turn additional. (7) Verify fixture is level using carpenter level across horizontal surface of fixture. (8) Apply continuous bead of exterior-grade silicone caulk around top and both sides of fixture base where it meets wall. (9) Never caulk the bottom edge — leaves drainage path for water intrusion. (10) Allow caulk to cure minimum 24 hours before exposing to rain. The mounting safety check: gently push and pull on fixture after installation — should not move, rattle, or shift.
How do you wire an outdoor light fixture?
Wiring an outdoor light fixture follows the universal color-to-color connection method: (1) Turn off power and verify with voltage tester — non-negotiable safety first step. (2) Strip wire ends approximately 5/8 inch using wire strippers (not knife); twist bare copper to consolidate strands. (3) Identify wire colors: Black wires = Hot/Live (carry current from source). White wires = Neutral (return current to source). Bare copper or green wires = Ground (safety path). (4) Connect wires color-to-color: twist matching wire ends together clockwise; never connect different colors together. (5) Apply wire nuts — twist appropriate-size wire nut clockwise over twisted wire ends until snug; gentle pull verifies secure connection. (6) Wrap with electrical tape for additional moisture protection and security. (7) Some fixtures only have hot and neutral (no ground wire) — cap off ground wire from house with wire nut in this case. (8) NEC code requirements: outdoor circuits must have GFCI protection (NEC 210.8); use only outdoor-rated UF cable (not indoor Romex NM-B); fixtures must be marked for damp or wet location (NEC 410.16). If existing wiring uses different colors: stop and consult a licensed electrician before proceeding.
Can you install outdoor lights yourself?
Yes — most outdoor light installations are appropriate DIY projects for homeowners with basic tool skills: DIY-appropriate projects: (1) Replacing existing fixture — most beginner-friendly; 30-60 minutes typical; basic tool skills only. (2) New fixture on existing electrical box — 1-2 hours; comfortable with wire connections required. (3) Smart fixture upgrade — same as standard installation plus app pairing. (4) Solar-powered fixture installation — no electrical work at all; ground stake or wall mount only. When to call licensed electrician: (1) New circuit installation — requires permit in most US jurisdictions; circuit breaker panel work involves shock and fire risk. (2) Knob and tube or aluminum wiring — older wiring types require specialized connection techniques. (3) Multiple fixture coordinated installation with new wiring runs. (4) Any work requiring permit and inspection per local building code. (5) If uncertain about wire identification or local electrical code requirements. Safety considerations: always turn off power at circuit breaker; verify with non-contact voltage tester before touching wires; work with a helper for substantial fixtures or ladder work; never work during rain or high humidity. Insurance consideration: electrical code violations can void homeowner's insurance — when uncertain, hire licensed electrician for code compliance.
How much does it cost to install an outdoor light fixture?
Outdoor light fixture installation cost varies by project type: Replacing existing fixture: $50-200 DIY (fixture + caulk + wire nuts); $100-250 professional labor + fixture cost. New fixture on existing electrical box: $75-250 DIY (fixture + mounting hardware); $150-400 professional labor + fixture. New installation with new electrical box on siding: $150-400 DIY (fixture + box + mounting block + cable); $300-700 professional labor + materials. New installation with new electrical box on brick: $200-500 DIY (fixture + box + masonry anchors + cable); $400-900 professional labor + materials. New circuit with new wiring run: $500-1,500+ professional installation (requires permit and inspection in most jurisdictions; typically not DIY). Smart fixture with WiFi integration: $100-400 DIY (smart fixture + standard installation materials); $150-400 professional. Cost factors: fixture quality and price ($30-1,500+ depending on quality); local electrician labor rates ($50-150/hour typical); permit fees ($25-150 typical if required); ladder rental ($25-50/day if needed); difficult access locations may increase labor 25-50%. The labor cost reality: most outdoor fixture installations require 30-90 minutes professional time — labor cost typically less than the fixture cost itself.
Do I need an electrician to install an outdoor light?
Whether you need an electrician depends on the specific project scope: Don't typically need electrician (DIY appropriate): (1) Replacing existing outdoor fixture; (2) Installing new fixture on existing electrical box; (3) Smart bulb installation in existing fixture; (4) Solar-powered fixture installation. Should consider electrician (intermediate complexity): (1) New fixture requiring new electrical box installation; (2) Cable rerouting or extending; (3) Brick or stucco installations if uncomfortable with masonry work; (4) Hardwired smart switch replacement. Always need licensed electrician: (1) New circuit installation requiring breaker panel work; (2) Permit-required work per local building code; (3) Older home with knob and tube or aluminum wiring; (4) Work near main service entrance; (5) Insurance-required licensed electrician work; (6) Commercial property installations. NEC code compliance: all outdoor electrical work must comply with current NEC requirements including GFCI protection (NEC 210.8), wet-location-rated boxes (NEC 314.27), wet-location-rated luminaires (NEC 410.16), and UV-resistant outdoor cable (NEC 310.10). Improper installation can void homeowner's insurance and create fire hazards. The when-in-doubt rule: if uncertain about any aspect of the installation, hire a licensed electrician. The cost ($150-400 typical) provides peace of mind, code compliance, and warranty protection.
How do you install an outdoor light without existing wiring?
Installing outdoor light without existing wiring offers two approaches — solar-powered (no electrical work) or new circuit installation (requires electrician): Solar-powered approach (DIY): (1) Choose solar-powered outdoor fixture with integrated photovoltaic panel and LED. (2) Identify location receiving 6+ hours direct sunlight daily for solar charging. (3) Mount fixture via wall mount or ground stake (no electrical connection). (4) Allow 24-48 hours initial charge before use. (5) Most modern solar fixtures include photo sensor for automatic on/off. Battery-powered alternatives: portable LED fixtures with replaceable batteries; ideal for temporary installations or rentals. New circuit installation approach (requires electrician): (1) Licensed electrician runs new cable from existing electrical panel; (2) Installs new circuit breaker dedicated to outdoor circuit; (3) Routes outdoor-rated UF cable through wall to fixture location; (4) Installs weatherproof electrical box; (5) Installs and wires fixture. Cost comparison: solar approach $30-300 (just the fixture); battery approach $20-150; new circuit approach $500-1,500+ (electrician labor + materials + permit). Best solar-powered options: browse our solar lights collection for integrated LED solar fixtures eliminating all electrical installation work.
What IP rating do outdoor lights need?
Outdoor light fixtures require IP rating matching exposure level: IP44 (minimum for outdoor use): protected against water splash from any direction; appropriate for covered porches, protected entries, and overhang-shielded locations. The minimum acceptable rating for any outdoor fixture. IP54: dust-protected; splash water resistant; appropriate for partially exposed locations. IP65 (recommended for full exposure): dust-tight; resistant to water jets from any angle; appropriate for fully exposed exterior walls without overhang protection. The most common rating for fully exposed residential applications. IP67: dust-tight; protected against temporary immersion in water up to 1 meter; appropriate for ground-level landscape lighting, areas prone to puddling, and walkway lighting at grade level. IP68: dust-tight; continuous immersion protected; appropriate for submersible applications including pool deck, pond, and underwater landscape fixtures. How to read IP ratings: first digit (0-6) indicates dust/solid protection; second digit (0-9) indicates water protection. IP44 = level 4 dust + level 4 water; IP65 = level 6 dust + level 5 water. Verification: IP rating displayed on fixture packaging or manufacturer specifications. Always verify rating matches your installation exposure level before purchase.
Closing Notes on Outdoor Light Fixture Installation
The 10-step installation process delivers safe, code-compliant outdoor light fixture installation when followed precisely. Apply surface-specific approaches (masonry anchors for brick, mounting block for lap siding, flexible caulk for stucco), maintain minimum IP44 rating with IP65 for full weather exposure, and never caulk the bottom edge of any fixture — leave drainage path open. For new circuit work or older wiring (knob and tube, aluminum), hire a licensed electrician for code compliance and insurance protection.
For complementary outdoor lighting decisions, see our related resources: outdoor lighting selection guide, mid-century modern outdoor lighting, complete solar lighting guide, types of light fixtures, fixture selection guide, color temperature guide, light bulb types, lighting without rewiring, lighting design mistakes, and ceiling fan electricity guide.


