

Cleaning foyer lighting and chandeliers safely requires turning off power at the circuit breaker, allowing bulbs to cool, gathering material-appropriate supplies, and following systematic cleaning procedures specific to crystal, metal, glass, or LED fixtures. This complete 2026 guide covers safety preparation, supply selection, dusting techniques, material-specific cleaning methods for crystal chandeliers, brass/chrome/nickel metal fixtures, glass shades, LED fixtures, plus dedicated procedures for high ceiling chandelier dusting, hard-to-reach foyer lighting, farmhouse lighting fixtures, and choosing the best spray cleaners for residential light fixtures.
Why Clean Your Foyer Lighting?
- Maintains light output. Dust accumulation on bulbs and fixtures reduces light output significantly — clean fixtures deliver up to 30% more illumination than heavily dusted equivalents.
- Extends fixture lifespan. Regular cleaning prevents corrosion, oxidation, and material degradation across crystal, metal, and glass components.
- Preserves finish quality. Brass, nickel, chrome, and bronze finishes maintain visual appeal through proper material-appropriate care.
- Reduces fire hazards. Dust on hot bulbs and electrical components creates fire risk; regular cleaning reduces this risk substantially.
- Improves indoor air quality. Dust accumulation on fixtures contributes to indoor air pollution; regular cleaning improves air quality especially for allergy-sensitive residents.
- Enhances welcoming first impression. Foyer is the first space guests see — clean lighting fixtures contribute to polished home presentation.
- Maintains crystal sparkle. Crystal chandeliers depend on clean facets for substantial light reflection and prismatic dispersion; dust dramatically reduces sparkle effect.
- Energy efficiency. Clean LED fixtures with proper heat dissipation maintain efficiency and longevity compared to dust-covered alternatives.
Safety First — Critical Pre-Cleaning Steps
- Turn off power at circuit breaker. Wall switches don't always disconnect all power — some wiring configurations leave one wire energized. Always disconnect at the main circuit breaker.
- Verify power is off with voltage tester. Non-contact voltage tester ($15-30) confirms no current flows before touching fixture. Critical safety step.
- Allow bulbs to cool completely. 15-30 minutes after last use. Hot incandescent or halogen bulbs crack when contacted with cleaner. LED bulbs cool faster but still benefit from cooling time.
- Use a sturdy ladder or step stool. Verify ladder rated for combined weight; position on level ground; ensure stability before climbing. Helper provides ladder stability.
- Wear non-slip shoes. Stable footing throughout cleaning. Avoid wet shoes or socks.
- Wear rubber gloves. Protects hands from cleaning chemicals and provides better grip on wet crystals or glass.
- Safety goggles for crystal cleaning. Cleaning agents may splash; safety goggles prevent eye irritation.
- Two-person cleaning for substantial chandeliers. Large or heavy fixtures benefit from helper providing ladder stability and supporting components.
- Lay drop cloth beneath fixture. Protects floors from dripping cleaner and catches accidentally dropped components.
- Photograph the chandelier before removing crystals. Reference photo for proper reassembly — particularly important for substantial multi-tier crystal chandeliers.
- If uncertain about any step, hire a professional cleaning service. Safety priority outweighs cleaning cost savings.
Cleaning Supplies for Foyer Lighting
| Supply | Purpose | Cost | For Which Fixture Type |
|---|---|---|---|
| Soft microfiber cloths (lint-free) | Dusting, drying, polishing | $8-15 (pack) | All fixtures |
| Long-handled duster (telescoping) | High fixtures, hard-to-reach areas | $15-40 | High ceiling fixtures |
| Soft-bristle brush | Detail work, intricate components | $5-15 | Crystal, textured glass, ornate metal |
| Isopropyl alcohol (70% or 91%) | Crystal cleaning solution | $3-8 | Crystal chandeliers |
| Distilled water | Mixing with alcohol; rinse | $1-3 per gallon | Crystal, all fixtures |
| Mild dish soap (clear, gentle) | Light cleaning, glass shades | $3-8 | Glass, mild metal cleaning |
| Spray bottle | Applying cleaning solutions | $3-6 | All fixtures |
| Metal polish (material-specific) | Brass, chrome, brushed nickel polishing | $10-20 | Metal fixtures (separate per metal type) |
| White vinegar | Stubborn dirt, brushed nickel | $3-6 | Stainless steel, brushed nickel |
| Glass cleaner (ammonia-free) | Glass shades and globes | $5-10 | Glass components only |
| Cotton swabs | Tight spaces, detail cleaning | $3-6 | Ornate crystal, intricate metal |
| Canned air duster | Cobwebs, hard-to-reach dust | $8-15 | All fixtures, hard-to-reach |
| Drop cloth or plastic sheeting | Floor protection | $5-15 | All cleaning sessions |
| Rubber gloves + safety goggles | Personal protection | $10-20 | All cleaning sessions |
- Always test cleaners on hidden spot first. Apply small amount to inconspicuous area; check for finish damage before broader application.
- Use material-appropriate cleaners. Brass polish on chrome will damage finish; glass cleaner on crystal may leave residue. Match cleaner to fixture material.
- Avoid harsh chemicals. Ammonia, bleach, abrasive cleaners damage most light fixture finishes. Use mild material-specific options.
- Avoid spraying cleaner directly on fixtures. Spray cloth instead, then wipe fixture. Direct spray can damage electrical components or seep into wiring.
- Use distilled water for crystal cleaning. Tap water contains minerals that leave spots on crystal. Distilled water dries spot-free.
General Dusting Techniques

-
Use a long-handled duster for high fixtures.
Telescoping dusters reach 6-12 ft fixtures without ladder use. Microfiber heads capture dust without scattering. Move duster gently to avoid disturbing crystal components.
-
Work from top to bottom.
Start dusting at the top of the fixture (canopy, top crystals) and work downward. Dust falls naturally — top-to-bottom approach prevents recontamination of already-cleaned areas.
-
Use soft brush for intricate details.
Soft-bristle brush reaches small spaces between crystals, behind decorative elements, and within intricate metalwork. Gentle pressure prevents damage.
-
For stuck-on dust, use a slightly damp cloth.
Dampen microfiber cloth with distilled water or appropriate cleaner. Squeeze excess moisture before contact with fixture. Wipe gently in single direction.
-
Dry immediately with clean cloth.
Wet residue creates water spots, especially on crystal and glass. Have dry cloth ready for immediate post-cleaning drying.
-
Don't forget the bulbs.
Dust on bulbs significantly reduces light output. Cool bulbs completely before cleaning. Wipe bulb surface with dry microfiber cloth.
- Weekly dusting recommended. Foyer lighting at entry collects more dust than interior fixtures due to door traffic and outdoor air exchange.
- Canned air for cobwebs. Compressed air dusters reach hard-to-clean cobwebs in ornate chandelier components without disturbing crystal arrangement.
- Pre-dust before deep cleaning. Always dust before applying liquid cleaners — wet dust creates muddy residue harder to clean than dry dust.
How to Clean Crystal Chandeliers
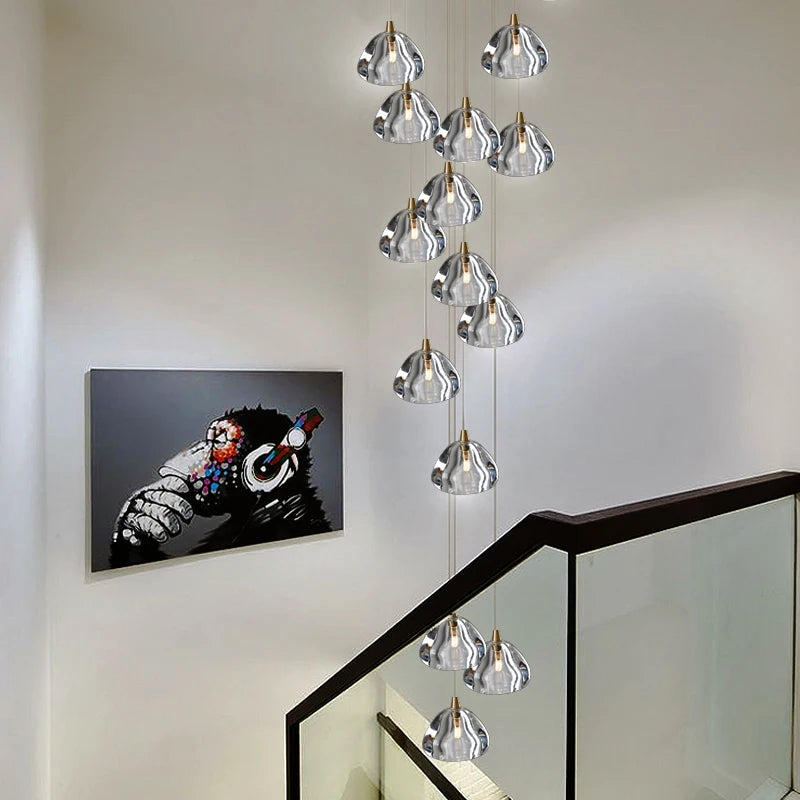
Crystal chandeliers require specific cleaning approaches preserving prismatic light reflection. Browse our crystal chandeliers collection.
-
Mix the crystal cleaning solution.
Standard professional crystal cleaning solution: 1 part isopropyl alcohol (70% or 91%) to 3 parts distilled water. Combine in spray bottle. The alcohol evaporates without water spots; distilled water prevents mineral residue.
-
Photograph chandelier for reassembly reference.
Before removing any crystals, photograph the chandelier from multiple angles. Reference photos prevent reassembly mistakes — particularly important for multi-tier chandeliers with hundreds of crystals.
-
Choose drip-dry method OR removal method.
Drip-dry method (faster, on-fixture): spray solution directly on crystals while attached to fixture; let drip dry. Place drop cloth beneath fixture. Removal method (deeper clean): remove crystals one section at a time; clean off-fixture; reassemble per photo reference.
-
Apply solution to soft cloth, not directly on fixture.
If using removal method, spray solution on soft microfiber cloth. Apply cloth to each crystal individually. Direct fixture spray can affect electrical components.
-
Clean each crystal individually.
Hold crystal gently with one hand; clean with damp cloth in other hand. Work through one section at a time to avoid missing crystals. Rinse cloth between sections to prevent dirt redistribution.
-
Use soft brush for intricate cuts.
Multi-faceted crystals have tight cuts that cloth cannot reach. Soft-bristle brush dipped in solution cleans intricate facets without damage.
-
Rinse with damp cloth.
After cleaning, wipe crystals with cloth dampened in distilled water only. Removes any solution residue.
-
Dry with soft cloth.
Lint-free microfiber cloth dries crystals without spots. Hold each crystal gently while drying.
- White cotton gloves recommended. Cotton gloves prevent fingerprints on crystals during cleaning and reassembly.
- Work systematically section-by-section. Substantial multi-tier crystal chandeliers benefit from systematic top-to-bottom, left-to-right approach.
- Frequency for foyer crystal chandeliers: dust weekly; deep clean every 3-6 months; professional cleaning annually for complex 9-21+ bulb chandeliers.
- Avoid harsh chemicals. Ammonia, vinegar, abrasive cleaners damage crystal coatings and lead crystal lead content.
- Don't use water alone. Pure water leaves mineral spots; the alcohol-water solution evaporates cleanly.
- For ornate or antique crystal chandeliers, hire a professional service. Substantial investment fixtures benefit from professional expertise; cleaning cost $150-500+ per service for substantial chandeliers.
- Special crystal cleaner option. Commercial crystal cleaners ($15-25) provide extra shine. Spray on cloth first, not directly on crystals.
How to Clean Metal Light Fixtures
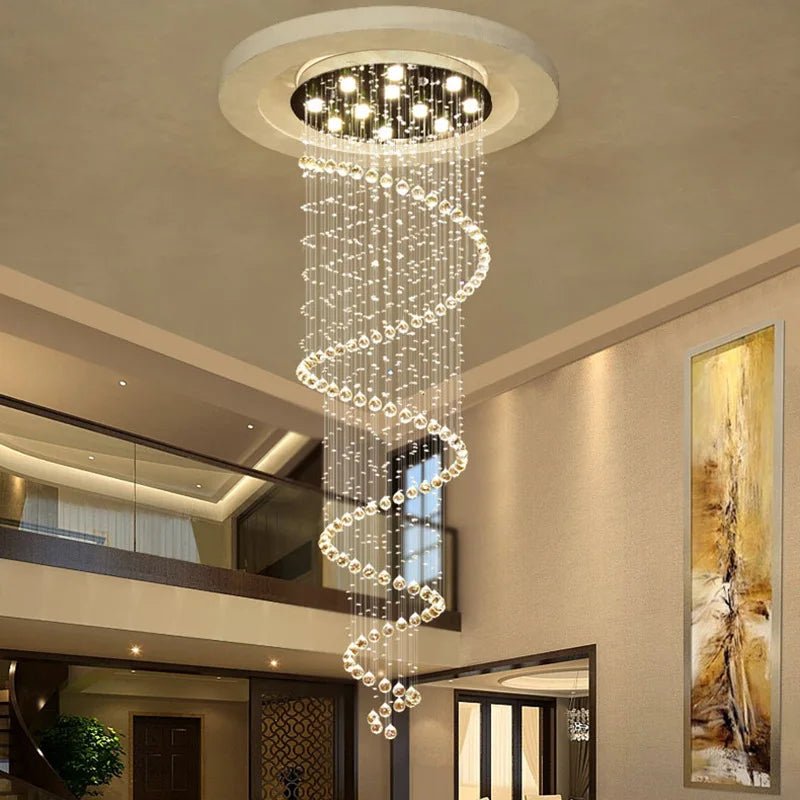
Metal fixture cleaning depends substantially on metal type and finish. Apply material-specific approaches.
| Metal Finish | Cleaning Solution | Method | Avoid |
|---|---|---|---|
| Polished Brass | Warm water + mild dish soap; brass polish optional | Soft cloth circular motion; rinse + dry immediately | Vinegar, ammonia, abrasive cleaners |
| Aged/Antique Brass | Damp cloth only — preserve patina | Light wipe; minimal cleaning | Polish (removes patina), abrasives |
| Polished Chrome | Warm water + mild dish soap | Soft cloth; chrome polish for shine | Vinegar, abrasive scrubbers |
| Brushed Nickel | Damp cloth + mild soap; vinegar+water for stubborn dirt | Wipe in direction of metal grain | Cross-grain wiping, abrasive cleaners |
| Oil-Rubbed Bronze | Damp cloth only — preserve dark patina | Light wipe; furniture wax optional | Soap (strips coating), polish, abrasives |
| Matte Black | Damp cloth only or very mild soap | Light wipe in single direction | Polish, abrasives, alcohol-based cleaners |
| Wrought Iron | Damp cloth + mild soap; furniture wax for protection | Wipe, dry immediately, wax annually | Excessive water (causes rust) |
| Stainless Steel | Vinegar + water OR specialty stainless cleaner | Wipe in direction of grain | Chlorine bleach, abrasive pads |
- Test cleaner on hidden spot first. Different finishes respond differently — always verify before broader application.
- Rinse and dry immediately. Standing water creates spots and can damage finishes; immediate drying prevents issues.
- Use metal polish sparingly. Polish only on specifically polished finishes; avoid on aged, antique, oil-rubbed, or matte finishes.
- Wipe in single direction. Brushed and grained finishes require directional wiping matching the metal grain for consistent appearance.
- For antique or specialty fixtures, consult professional restorer. Substantial vintage fixtures benefit from expert care preserving collectible value.
- Frequency for metal foyer fixtures: monthly dusting; quarterly deep cleaning; annual polishing for polished finishes.
How to Clean Glass Shades and Globes

-
Remove glass components if possible.
Check manufacturer instructions for safe removal. Most glass shades and globes detach by unscrewing or unclipping. Off-fixture cleaning is deeper and easier.
-
Wash in soapy water OR use glass cleaner.
Fill sink or basin with warm water + mild dish soap. Submerge glass components; gently wash with soft cloth. Alternative: spray ammonia-free glass cleaner on cloth, then wipe glass.
-
For tough spots, soak in vinegar and water.
1 part white vinegar to 3 parts warm water. Soak stubborn dirt 10-15 minutes. Vinegar dissolves mineral deposits and grease without damaging glass.
-
Rinse thoroughly.
Soap residue creates streaks. Rinse with clean warm water. For spot-free results, use distilled water for final rinse.
-
Dry with soft microfiber cloth.
Lint-free cloth prevents fibers transferring to glass. Polish in circular motion for spot-free finish.
-
Verify glass is completely dry before reassembly.
Moisture trapped between glass and metal can cause damage. Allow extra drying time for textured or frosted glass.
- For glass that cannot be removed. Clean carefully in place. Spray glass cleaner on cloth (not directly on fixture). Wipe gently in circular motion.
- For textured or frosted glass. Soft brush reaches textured surfaces. Be gentle to prevent breakage. Air-dry rather than rubbing.
- Handle glass with care. Always support glass from beneath; avoid grabbing edges; place on padded surface during cleaning.
- Replace cracked or chipped glass. Damaged glass creates safety hazard and reduces light output; replacement often more cost-effective than repair.
- Frequency for glass foyer fixtures: monthly cleaning; deep cleaning every 3-6 months.
How to Clean LED Foyer Lighting
- Dust with dry cloth primarily. LED bulbs and fixtures need minimal moisture; dry microfiber cloth handles most cleaning needs.
- For deeper cleaning, use slightly damp cloth. Barely dampened cloth removes stubborn dust without introducing excess moisture.
- Clean vents and heat sinks. LED fixtures dissipate heat through vents. Dust accumulation reduces heat dissipation and shortens LED lifespan. Use canned air for vent cleaning.
- Check for loose or damaged wires. LED-integrated fixtures may have visible wire connections; periodically verify connections remain secure.
- Avoid spraying directly on LED components. Moisture damages LED drivers and electronics; always spray cloth instead of fixture.
- Allow LED to cool before cleaning. While LEDs run cooler than incandescent, they still benefit from 5-10 minute cooling time before cleaning.
- If LED flickers or color shifts after cleaning, disconnect and inspect. Symptoms may indicate moisture damage or loose connections requiring professional attention.
- Frequency for LED foyer fixtures: dust monthly; deeper clean quarterly.
High Ceiling Chandelier Dusting & Cleaning
High ceiling foyer chandeliers (12+ ft) present unique cleaning challenges requiring specialized equipment and safety procedures.
- Telescoping duster is essential. Extendable dusters reach 8-20+ ft fixtures without requiring ladder use. Microfiber heads capture dust effectively.
- Adjustable extension pole + microfiber head. Telescoping poles with interchangeable cleaning heads handle both dusting and gentle wet cleaning.
- Scaffolding for major cleaning. Substantial deep cleaning of high foyer chandeliers benefits from rented scaffolding ($150-400 weekly) providing stable platform.
- Extension ladder with second-person support. Substantial extension ladders (16-32 ft) reach high ceilings; second person provides ladder stability and tool handling.
- Professional chandelier service for 14+ ft fixtures. Two-story foyer chandeliers warrant professional cleaning service ($200-600 per session) — specialized equipment plus safety expertise.
- Hydraulic lift for very substantial installations. Substantial commercial-grade foyer chandeliers above 20 ft may require small hydraulic lift access ($300-800 daily rental + operator).
- "High ceiling chandelier dusting" specific technique. Telescoping microfiber duster combined with overhead extension reach handles most dusting without ladder use. Frequency: bi-weekly to monthly.
- Drip-dry crystal cleaning from below. For high crystal chandeliers, spray-from-below method with drop cloth beneath allows partial cleaning without lowering fixture.
- Lower fixture for thorough cleaning. Some high ceiling chandeliers have chain mechanisms allowing controlled lowering to accessible height — verify mechanism availability before installation.
- Schedule annual professional cleaning for substantial high ceiling crystal chandeliers. Substantial investment fixtures benefit from substantial expert care.
- Browse our foyer chandeliers collection for high ceiling options.
Hard-to-Reach Light Cleaning
- Telescoping extension poles. Adjustable poles reach 6-20+ ft fixtures with various attachment heads (dusters, brushes, spray heads).
- Canned compressed air. Blast cobwebs and dust from hard-to-reach detail areas without ladder positioning.
- Microfiber duster heads. Replaceable microfiber covers fit various extension poles; capture dust effectively without scattering.
- Soft-bristle brush attachments. Reach intricate components on extension poles for detail cleaning without ladder use.
- Vacuum attachment for substantial dust. Vacuum with soft brush attachment (low suction) handles substantial dust without scattering.
- Two-person team for substantial fixtures. One person manages extension equipment; second person provides ladder stability and tool handoff.
- Photograph before cleaning for reassembly. Even hard-to-reach areas need photographic reference for proper post-cleaning verification.
- Schedule cleaning sessions during daylight. Substantial natural light improves visibility for thorough cleaning of hard-to-reach areas.
- Professional service for substantial hard-to-reach installations. Substantial complex installations benefit from professional expertise rather than DIY attempts.
Farmhouse Lighting Cleaning
Farmhouse lighting fixtures often combine multiple materials — wrought iron, blackened steel, mason jar glass, distressed wood — requiring material-specific cleaning approaches.
- Identify farmhouse fixture materials first. Most farmhouse fixtures combine 2-4 materials; identify each before selecting cleaners.
- Wrought iron components. Damp cloth with mild soap; dry immediately to prevent rust; furniture wax annually for protection.
- Blackened steel components. Damp cloth only; avoid abrasives or polishes that disturb the blackened finish.
- Mason jar glass shades. Standard glass cleaning approach; soak in vinegar+water for hard water spots common in farmhouse fixtures.
- Distressed wood elements. Soft cloth dusting; wood-specific cleaner ($8-15) for deeper cleaning; avoid water that damages wood finish.
- Edison bulb cleaning. Cool completely before cleaning; dry cloth removes most dust; bulbs collect dust faster than enclosed alternatives.
- Cage components. Soft brush reaches between cage wires; canned air blasts cobwebs from intricate cage designs.
- Mixed metal coordination. If farmhouse fixture combines brass + blackened steel, clean each metal with material-appropriate approach.
- Frequency for farmhouse foyer fixtures: weekly dusting; monthly deeper cleaning; annual wood treatment + iron waxing.
- Preserve intentional patina. Distressed and aged finishes are intentional — don't over-clean or polish surfaces meant to look weathered.
Best Spray Cleaners for Light Fixtures
| Cleaner Type | Best For | How to Apply | Cost |
|---|---|---|---|
| Isopropyl alcohol + distilled water (1:3 mix) | Crystal chandeliers | Spray on cloth OR drip-dry method | $5 total mix |
| Commercial crystal cleaner | Premium crystal chandeliers | Spray on cloth, gentle wipe | $15-25 per bottle |
| Ammonia-free glass cleaner | Glass shades and globes | Spray on cloth, circular wipe | $5-10 |
| White vinegar + water (1:3) | Brushed nickel, mineral spots | Spray on cloth, wipe with grain | $3-5 |
| Mild dish soap + warm water | Polished brass, chrome, glass | Soft cloth, rinse, dry immediately | $3-5 |
| Metal polish (material-specific) | Polished brass or chrome shine | Apply small amount to cloth | $10-20 |
| Microfiber cloth (dry) | LED fixtures, oil-rubbed bronze, matte black | Light wipe, no spray | $8-15 pack |
| Canned compressed air | Cobwebs, hard-to-reach dust | Short blasts at angle | $8-15 |
- Never spray directly on fixtures. Always spray on cloth first; direct spray can affect electrical components, drip into wiring, or splash unintended surfaces.
- Match cleaner to material. Wrong cleaner damages finishes — verify cleaner appropriate for your fixture material before application.
- Avoid harsh chemicals. Ammonia, bleach, abrasive cleaners damage most light fixture finishes.
- Test on hidden spot first. New cleaners should be tested on inconspicuous area before broader application.
- Store cleaners safely. Out of reach of children and pets; clearly labeled containers; original packaging preferred.
Foyer Lighting Maintenance Schedule
| Frequency | Activity | Time Investment |
|---|---|---|
| Weekly | Quick dust with long-handled duster; visual inspection | 5-15 minutes |
| Monthly | More thorough dusting + bulb wipe; check for burnt-out bulbs | 20-40 minutes |
| Quarterly | Deep clean appropriate to fixture material; vent cleaning for LEDs | 1-3 hours |
| Bi-annually | Crystal chandelier deep clean; metal polishing (polished finishes only) | 2-6 hours depending on complexity |
| Annually | Professional cleaning for substantial crystal chandeliers; mounting hardware inspection | $200-600 professional + 1 hour DIY inspection |
| As needed | Cobweb removal, water spot treatment, troubleshooting issues | Variable |
Troubleshooting Common Cleaning Issues
- Water damage. If water seeps into electrical components, disconnect power immediately; do not use fixture until inspected by electrician. May indicate wiring damage requiring repair.
- Bugs and insects. Vacuum with soft brush attachment (low suction) removes bugs without disturbing fixture; follow with regular cleaning.
- Cobwebs. Canned compressed air blasts cobwebs from hard-to-reach areas without disturbing crystal arrangement.
- Tarnished brass. Material-specific brass polish ($10-20) restores polished brass shine; avoid polish on aged/antique brass which should retain patina.
- Yellow plastic components. Baking soda + water paste removes yellowing from plastic light fixture components; gentle scrubbing with soft cloth.
- Mineral deposits on crystal. Isopropyl alcohol + distilled water solution dissolves mineral deposits; for stubborn deposits, soak crystals 5-10 minutes in solution.
- Flickering after cleaning. Likely loose bulb or moisture in electrical connection; allow extra drying time; tighten bulbs gently.
- Color temperature changes after cleaning. May indicate moisture damage to LED bulb or driver; replace affected bulb; if persistent, consult electrician.
- Strange smells when powered on. Disconnect immediately; may indicate moisture in wiring; inspect before further use.
When to Call a Professional Cleaning Service
- High ceiling installations (14+ ft). Substantial fall risk + scaffolding requirements + safety considerations justify professional service.
- Substantial multi-tier crystal chandeliers. Substantial complex chandeliers with hundreds of crystals benefit from expert systematic cleaning.
- Antique or vintage fixtures. Substantial collectible value warrants expert care preserving authenticity and condition.
- Substantial water or fire damage. Damaged fixtures require professional assessment before cleaning to avoid further damage or safety risks.
- Limited mobility or physical limitations. Cleaning substantial high fixtures safely requires substantial physical capability; professional service is the safer option.
- Substantial multi-fixture homes. Substantial homes with multiple substantial chandeliers benefit from annual whole-home professional cleaning service ($600-2,000).
- Substantial uncertainty about fixture material. Wrong cleaner damages finishes; professional services have expertise across all materials.
- When hiring: verify insurance + licensing; ask about chandelier cleaning experience; get 2-3 quotes; check reviews.
- Cost expectations: $150-400 standard chandelier cleaning; $400-800 substantial multi-tier crystal; $800-2,000+ whole-home multi-fixture service.
Browse Seus Lighting's foyer-focused collections — foyer lighting for all entry applications, foyer chandeliers for substantial statement installations, crystal chandeliers for luxury traditional foyers, all chandeliers across modern through traditional styles, and our custom service for unique foyer lighting requirements.
Foyer Lighting Foyer Chandeliers Crystal Chandeliers All Chandeliers Custom Service
Frequently Asked Questions
How do you clean foyer lighting?
Clean foyer lighting through 6-step systematic process: (1) Turn off power at circuit breaker — wall switch insufficient; verify with voltage tester. (2) Allow bulbs to cool completely — 15-30 minutes after use. (3) Gather material-appropriate supplies — soft microfiber cloths, mild dish soap, distilled water, isopropyl alcohol for crystal, metal-specific polish for brass/chrome, glass cleaner for shades. (4) Dust before deep cleaning — long-handled duster for high fixtures; soft brush for detail work. (5) Apply material-specific cleaning method: crystal = 1:3 isopropyl alcohol to distilled water; brass/chrome = warm soapy water + soft cloth; brushed nickel = damp cloth wiped with metal grain; glass = standard glass cleaner; LED = dry cloth only, minimal moisture. (6) Dry thoroughly before restoring power — moisture and electricity create shock and damage risks. Maintenance schedule: weekly dusting + monthly thorough cleaning + quarterly deep cleaning + annual professional service for substantial crystal chandeliers. Safety equipment: sturdy ladder, non-slip footwear, rubber gloves, safety goggles. For high ceiling foyer chandeliers: telescoping duster, professional service for fixtures above 14 ft, or two-person team with extension ladder.
How do you clean a crystal chandelier?
Clean a crystal chandelier through systematic 8-step process: (1) Mix professional crystal cleaning solution: 1 part isopropyl alcohol (70% or 91%) to 3 parts distilled water in spray bottle. (2) Photograph chandelier from multiple angles for reassembly reference — particularly important for multi-tier chandeliers. (3) Choose drip-dry method (faster, on-fixture) OR removal method (deeper clean). (4) Apply solution to soft cloth, not directly on fixture — direct spray can affect electrical components. (5) Clean each crystal individually — hold gently with one hand; clean with damp cloth in other hand; work section-by-section. (6) Use soft brush for intricate cuts — multi-faceted crystals have tight cuts cloth cannot reach. (7) Rinse with cloth dampened in distilled water — removes solution residue. (8) Dry with lint-free microfiber cloth — prevents water spots. Critical considerations: turn off power at circuit breaker first; allow bulbs to cool completely; wear cotton gloves to prevent fingerprints; lay drop cloth beneath fixture; photograph before removing any crystals. Frequency: dust weekly; deep clean every 3-6 months; annual professional cleaning for substantial 9-21+ bulb chandeliers ($150-500+ per service). What to avoid: harsh chemicals (ammonia, vinegar, abrasive cleaners), water alone (leaves mineral spots), spraying directly on fixture. Browse our crystal chandeliers collection.
How do you clean light fixtures?
Clean light fixtures through material-specific approach: (1) Crystal fixtures: 1 part isopropyl alcohol to 3 parts distilled water; apply to cloth; clean each crystal individually. (2) Polished brass: warm water + mild dish soap; soft cloth; brass polish optional for shine; rinse and dry immediately. (3) Polished chrome: warm soapy water; soft cloth; chrome polish for shine. (4) Brushed nickel: damp cloth + mild soap OR vinegar+water for stubborn dirt; wipe in direction of metal grain. (5) Oil-rubbed bronze + matte black: damp cloth only; preserve dark patina/matte finish; avoid polish. (6) Aged/antique brass: damp cloth only; preserve patina; avoid polish. (7) Wrought iron: damp cloth + mild soap; dry immediately; furniture wax annually. (8) Stainless steel: vinegar+water OR specialty stainless cleaner; wipe in grain direction. (9) Glass shades: standard ammonia-free glass cleaner OR mild dish soap; remove if possible for deeper cleaning. (10) LED fixtures: dry cloth primarily; slightly damp for deeper cleaning; clean vents for heat dissipation. Universal pre-cleaning steps: turn off power at circuit breaker; allow bulbs to cool 15-30 minutes; verify with voltage tester; use sturdy ladder; wear non-slip shoes + rubber gloves; lay drop cloth. Universal post-cleaning steps: rinse thoroughly; dry completely before restoring power. Always test cleaner on hidden spot first.
What's the best way to clean farmhouse lighting fixtures?
Clean farmhouse lighting fixtures through material-specific approach addressing the multiple materials typically combined in farmhouse designs: (1) Identify fixture materials first: most farmhouse fixtures combine 2-4 materials (wrought iron + blackened steel + glass + wood). (2) Wrought iron components: damp cloth with mild soap; dry immediately to prevent rust; apply furniture wax annually for protection against humidity. (3) Blackened steel components: damp cloth only; avoid abrasives or polishes that disturb the intentionally blackened finish. (4) Mason jar or globe glass shades: standard glass cleaning approach with ammonia-free glass cleaner; soak in vinegar+water (1:3 ratio) for hard water spots common in farmhouse fixtures. (5) Distressed wood elements: soft cloth dusting; wood-specific cleaner ($8-15) for deeper cleaning; avoid water that damages wood finish. (6) Edison-style bulbs: allow to cool completely (15-30 minutes); dry cloth removes most dust; exposed Edison bulbs collect dust faster than enclosed alternatives. (7) Cage or lantern components: soft brush reaches between cage wires; canned compressed air blasts cobwebs from intricate cage designs. (8) Mixed metal coordination: if farmhouse fixture combines brass + blackened steel (common designer combination), clean each metal with material-appropriate approach. Critical preservation principles: (1) Preserve intentional patina — distressed and aged finishes are deliberate; don't over-clean. (2) Avoid harsh chemicals on weathered finishes. (3) Avoid polishing intentionally matte surfaces. Frequency for farmhouse foyer fixtures: weekly dusting; monthly deeper cleaning; annual wood treatment + iron waxing. Universal safety: turn off power at circuit breaker; allow bulbs to cool; use sturdy ladder; non-slip shoes + rubber gloves.
How do you dust a high ceiling chandelier?
Dust a high ceiling chandelier through specialized equipment and systematic procedures: (1) Telescoping duster (essential): extendable dusters reach 8-20+ ft fixtures without ladder use. Microfiber heads capture dust effectively. Best for routine bi-weekly dusting. (2) Adjustable extension pole + microfiber head: telescoping poles with interchangeable cleaning heads handle both dusting and gentle wet cleaning. (3) Scaffolding for major cleaning: substantial deep cleaning of high foyer chandeliers benefits from rented scaffolding ($150-400 weekly) providing stable platform. (4) Extension ladder with second-person support: substantial extension ladders (16-32 ft) reach high ceilings; second person provides ladder stability and tool handling. (5) Professional service for 14+ ft fixtures: two-story foyer chandeliers warrant professional cleaning ($200-600 per session) with specialized equipment and safety expertise. (6) Lower fixture if mechanism allows: some high ceiling chandeliers have chain mechanisms allowing controlled lowering to accessible height — verify mechanism before installation. (7) Drip-dry crystal cleaning from below: for high crystal chandeliers, spray-from-below method with drop cloth beneath allows partial cleaning without lowering. (8) Hydraulic lift for substantial installations: commercial-grade foyer chandeliers above 20 ft may require small hydraulic lift access ($300-800 daily). Frequency for high ceiling foyer chandeliers: bi-weekly to monthly dusting with telescoping equipment; annual professional deep cleaning for substantial crystal chandeliers. Critical safety: turn off power at circuit breaker; allow bulbs to cool; two-person team for substantial fixtures; never overreach from ladder.
How often should I clean my foyer chandelier?
Foyer chandelier cleaning frequency depends on fixture type and complexity: (1) Weekly dusting: 5-15 minutes; quick dust with long-handled duster; visual inspection for issues. Foyer fixtures collect more dust than interior fixtures due to door traffic. (2) Monthly thorough dusting + bulb wipe: 20-40 minutes; more detailed dusting; bulb cleaning; check for burnt-out bulbs requiring replacement. (3) Quarterly deep cleaning: 1-3 hours; material-specific cleaning approach; vent cleaning for LED fixtures; metal polishing for polished finishes. (4) Bi-annual crystal deep clean: 2-6 hours depending on complexity; full crystal cleaning with alcohol+water solution; section-by-section systematic approach. (5) Annual professional service: $200-600 per session; substantial crystal chandeliers benefit from professional expertise; mounting hardware inspection. (6) As needed: cobweb removal, water spot treatment, troubleshooting issues. Factors affecting frequency: (1) Fixture complexity: simple drum shade vs multi-tier crystal — complex fixtures need more frequent attention. (2) Home environment: pets, smokers, fireplaces, kitchen proximity all increase cleaning frequency needs. (3) Geographic location: humid climates accelerate metal tarnishing; dusty climates increase dust accumulation. (4) Foyer usage: front door entry sees more dust through door traffic than secondary entries. (5) Air filtration: homes with HEPA filtration need less frequent cleaning. Substantial high ceiling chandeliers: bi-weekly telescoping duster + annual professional cleaning typical.
Can I clean my chandelier without taking it down?
Yes — chandeliers can be cleaned without removing from ceiling through drip-dry method and section-by-section approaches: Drip-dry method for crystal chandeliers: (1) Turn off power at circuit breaker; verify with voltage tester. (2) Lay drop cloth beneath fixture protecting floors. (3) Mix 1 part isopropyl alcohol to 3 parts distilled water in spray bottle. (4) Spray solution directly on crystals while attached to fixture. (5) Allow crystals to drip dry. (6) Solution evaporates without water spots due to alcohol content. Section-by-section method: (1) Clean one section at a time with damp cloth. (2) Move ladder systematically around fixture covering all sections. (3) Photograph progress to track completed sections. Telescoping equipment for high fixtures: (1) Telescoping duster for routine dusting. (2) Extension pole with microfiber head for gentle wet cleaning. (3) Adjustable extension pole with brush attachment for detail work. Advantages of on-fixture cleaning: (1) Faster — no removal/reassembly time. (2) Lower fall risk — no carrying crystal components. (3) No reassembly errors — components stay in original positions. (4) Practical for substantial multi-tier chandeliers. Disadvantages: (1) Less thorough than removal method. (2) Drip-dry can leave streaks on some crystals. (3) Hard to reach inner crystals on multi-tier fixtures. When to remove for cleaning: substantial annual deep cleaning; substantial soap residue or mineral buildup; substantial repairs needed. Professional service for substantial complex chandeliers: $200-600 per session — expert systematic cleaning preserves substantial investment value.
What is the best spray cleaner for light fixtures?
Best spray cleaner depends on fixture material: (1) Crystal chandeliers: 1 part isopropyl alcohol (70% or 91%) to 3 parts distilled water — DIY solution ($5 total). Alternative: commercial crystal cleaner ($15-25). Spray on cloth, not directly on fixture. (2) Glass shades and globes: ammonia-free glass cleaner ($5-10); avoid ammonia which damages metal fixture components. Spray on cloth; circular wipe. (3) Brushed nickel + stainless steel: white vinegar + water (1:3 ratio); $3-5 total. Wipe in direction of metal grain. (4) Polished brass + chrome: mild dish soap + warm water; $3-5; soft cloth; rinse and dry immediately. Material-specific polish ($10-20) for extra shine. (5) Oil-rubbed bronze + matte black + aged brass: damp cloth only — no sprays needed; preserve patina/matte finish. (6) LED fixtures: dry microfiber cloth primarily; very minimal moisture if needed. (7) Wrought iron: mild soap + water; dry immediately; furniture wax annually. Universal principles: (1) Never spray directly on fixtures — always spray cloth first. (2) Always test cleaner on hidden spot first. (3) Match cleaner to material — wrong cleaner damages finishes. (4) Avoid harsh chemicals (ammonia, bleach, abrasive cleaners). (5) Store cleaners safely (out of reach of children/pets, clearly labeled). What to avoid: (1) Universal cleaners may damage specific finishes. (2) Bathroom cleaners are too harsh for most light fixtures. (3) Furniture polish damages crystal and glass. (4) Window cleaners contain ammonia damaging brass and other metals. Test before broader application: small inconspicuous area first; verify no finish damage; proceed with full application.
How do you clean hard-to-reach light fixtures?
Clean hard-to-reach light fixtures through specialized equipment and systematic procedures: (1) Telescoping extension poles: adjustable poles reach 6-20+ ft fixtures with various attachment heads (dusters, brushes, spray heads). $20-60 investment handles most hard-to-reach situations. (2) Canned compressed air: blast cobwebs and dust from hard-to-reach detail areas without ladder positioning ($8-15 per can). (3) Microfiber duster heads: replaceable microfiber covers fit various extension poles; capture dust effectively without scattering. (4) Soft-bristle brush attachments: reach intricate components on extension poles for detail cleaning. (5) Vacuum attachment with soft brush: low suction setting handles substantial dust without scattering; particularly effective for ornate fixtures. (6) Extension ladder with helper: substantial extension ladders (16-32 ft) reach high ceilings; second person provides ladder stability. (7) Scaffolding for major cleaning: rented scaffolding ($150-400 weekly) provides stable platform for substantial complex cleaning. (8) Two-person team for substantial fixtures: one person manages extension equipment; second person provides stability and tool handoff. Systematic approach: (1) Photograph fixture before cleaning for reference. (2) Work from top to bottom — dust falls naturally. (3) Schedule cleaning sessions during daylight for substantial natural light. (4) Work one section at a time. (5) Document progress to track completed areas. Critical safety: (1) Turn off power at circuit breaker. (2) Allow bulbs to cool. (3) Sturdy ladder rated for combined weight. (4) Non-slip footwear. (5) Never overreach — reposition ladder instead. (6) Helper provides ladder stability. When to call professional: substantial 14+ ft fixtures; substantial complex multi-tier crystal chandeliers; substantial physical limitations; substantial uncertainty about safety.
How do you clean brass light fixtures?
Clean brass light fixtures through finish-specific approach — polished brass and aged/antique brass require different methods: Polished brass cleaning: (1) Turn off power at circuit breaker; verify with voltage tester. (2) Allow bulbs to cool completely. (3) Mix warm water + mild dish soap. (4) Apply with soft cloth in gentle circular motion. (5) Rinse with clean damp cloth. (6) Dry immediately to prevent water spots. (7) Apply brass polish ($10-20) for extra shine using soft cloth — small amount; circular motion; buff to shine. (8) Verify all polish removed before restoring power. Aged/antique brass cleaning: (1) Same power and cool-down precautions. (2) Damp cloth with distilled water ONLY — preserve patina. (3) Avoid soap that may strip aged finish. (4) NEVER use brass polish — removes intentional patina developed over time. (5) Dust regularly with dry microfiber cloth. (6) Apply furniture wax annually for protection without altering patina. What to avoid for all brass: (1) Vinegar (too acidic, damages brass). (2) Ammonia (causes brass to darken inappropriately). (3) Abrasive cleaners or scrubbers (scratch finish). (4) Excessive water (causes water spots and oxidation). (5) Lemon juice (acidic, damages finish). Frequency: polished brass — monthly cleaning + quarterly polishing; aged brass — monthly dusting + annual waxing. Special considerations: (1) Lacquered brass (factory clear coating) needs only damp cloth — never polish. (2) Solid brass develops natural patina over time — intentional in some designs. (3) Brass-plated fixtures need gentler care than solid brass. (4) Antique brass fixtures may benefit from professional restoration. Identify your brass type: read fixture documentation; observe finish over time; consult manufacturer if uncertain.
How do you clean a chandelier safely?
Clean a chandelier safely through systematic safety procedures: (1) Turn off power at circuit breaker — wall switches don't always disconnect all power; some wiring configurations leave one wire energized. Always disconnect at main circuit breaker. (2) Verify power is OFF with voltage tester — non-contact voltage tester ($15-30); confirms no current before touching fixture. Critical safety step preventing electrical injuries. (3) Allow bulbs to cool completely — 15-30 minutes after last use. Hot bulbs crack when contacted with cleaning solution. (4) Use sturdy ladder rated for combined weight — position on level ground; verify stability; helper provides ladder support during cleaning. (5) Wear non-slip footwear — stable footing throughout cleaning session. (6) Wear rubber gloves — protects hands from cleaning chemicals + provides better grip on wet crystals/glass. (7) Safety goggles for crystal cleaning — cleaning agents may splash; goggles prevent eye irritation. (8) Two-person cleaning for substantial chandeliers — large or heavy fixtures benefit from helper providing ladder stability. (9) Lay drop cloth beneath fixture — protects floors + catches accidentally dropped components. (10) Photograph chandelier before cleaning — reference photo for reassembly if removing crystals. (11) Never spray cleaner directly on fixture — apply to cloth instead; direct spray can affect electrical components. (12) Dry thoroughly before restoring power — moisture + electricity creates shock and damage risks. (13) Schedule cleaning during daylight — substantial natural light improves visibility and safety. (14) Stop if uncomfortable — safety priority outweighs cleaning cost savings. When to hire professional: substantial high ceiling installations (14+ ft); substantial multi-tier crystal chandeliers; substantial physical limitations; substantial uncertainty about safety procedures.
How do you maintain and clean a dining room chandelier safely?
Maintain and clean a dining room chandelier safely through systematic procedures plus dining-specific considerations: Safety procedures (universal for all chandeliers): (1) Turn off power at circuit breaker. (2) Verify with voltage tester. (3) Allow bulbs to cool 15-30 minutes. (4) Lay drop cloth beneath fixture protecting dining table. (5) Use sturdy ladder; helper provides stability. (6) Non-slip footwear + rubber gloves. Dining-specific considerations: (1) Move dining chairs and table accessories away from work area. (2) Cover dining table with drop cloth — protects from drips and accidental component drops. (3) Schedule cleaning between meal services — completely dry before next dining use. (4) Consider food-safe cleaners for dining environment. Cleaning methods by material: (1) Crystal dining chandelier: 1 part isopropyl alcohol + 3 parts distilled water; clean each crystal individually; drip-dry method ideal for substantial chandeliers. (2) Glass dining chandelier: ammonia-free glass cleaner; spray on cloth not fixture. (3) Metal dining chandelier: material-specific approach (brass = soap+water; chrome = soap+water; brushed nickel = vinegar+water in grain direction; oil-rubbed bronze = damp cloth only). Maintenance schedule: (1) Weekly dusting (5-15 minutes). (2) Monthly thorough dusting + bulb wipe (20-40 minutes). (3) Quarterly deep cleaning (1-3 hours). (4) Bi-annual crystal deep clean for crystal chandeliers (2-6 hours). (5) Annual professional service for substantial chandeliers ($200-600). Dining-specific maintenance: (1) Inspect for food splatter — sometimes occurs above dining table. (2) Check for grease accumulation in kitchen-adjacent dining rooms. (3) More frequent cleaning needed for active entertaining homes. When to call professional: substantial multi-tier crystal chandeliers above dining table; substantial high ceiling dining rooms; substantial complex installations. Browse our chandeliers collection.
Wrapping Up
Cleaning your foyer lighting regularly keeps your entrance looking welcoming and extends fixture lifespan substantially. Apply material-specific cleaning approaches (1:3 isopropyl alcohol to distilled water for crystal, warm soapy water for polished brass and chrome, damp cloth only for aged/antique finishes, ammonia-free glass cleaner for shades, dry cloth primarily for LED), follow systematic safety procedures (circuit breaker shut-off, voltage verification, sturdy ladder, two-person team for substantial fixtures), and maintain consistent schedule (weekly dusting + monthly thorough cleaning + quarterly deep cleaning + annual professional service for substantial crystal chandeliers).
For complementary foyer lighting decisions, see our related resources: best foyer lighting, high ceiling foyer lighting ideas, how to clean and maintain your chandelier, how to install a chandelier, installing chandeliers on high ceilings, and how to safely hang a chandelier.


