

Installing a flush mount ceiling light is a beginner-friendly DIY project that takes 30-60 minutes, costs $50-300 for the fixture plus basic tools, and requires only a screwdriver, wire stripper, voltage tester, and ladder. This step-by-step 2026 guide walks through the complete 10-step installation process, covers US electrical wire color codes, mounting bracket installation, semi-flush mount alternatives, junction box weight ratings, troubleshooting common problems, and the critical safety considerations for safe DIY ceiling light installation.
What Are Flush Mount Lights?
Flush mount lights sit directly against the ceiling with no gap or hanging element. They work well for rooms with low ceilings (under 8 feet) and small spaces. These fixtures deliver even ambient illumination without collecting dust like hanging chandeliers. Browse our flush mount chandeliers collection for elegant flush mount options.
Semi-flush mount lights hang down 4-12 inches from the ceiling. They work for medium-ceiling rooms (8-10 feet) and accommodate more decorative designs. Both types serve different applications, so pick based on your ceiling height, room size, and desired aesthetic effect.
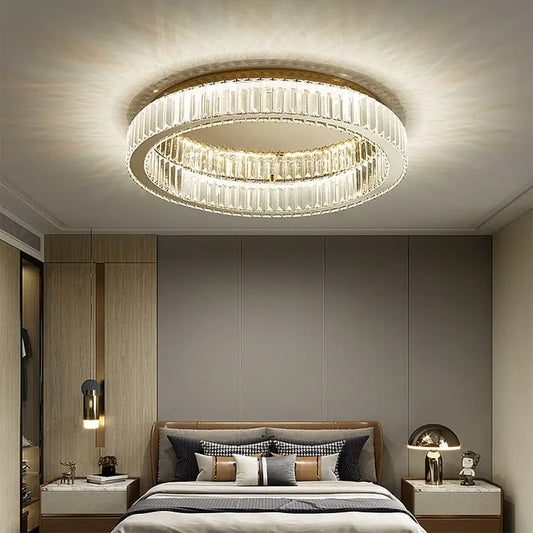
Flush Mount vs Semi-Flush Mount Comparison
| Feature | Flush Mount | Semi-Flush Mount |
|---|---|---|
| Ceiling drop | 0 inches (direct contact) | 4-12 inches drop |
| Best ceiling height | 7-8 feet | 8-10 feet |
| Room size | Small to medium | Medium to large |
| Light distribution | Even ambient | Dimensional with shadows |
| Decorative impact | Minimal — clean modern | Moderate decorative presence |
| Best rooms | Bedrooms, hallways, closets, low-ceiling rooms | Dining rooms, foyers, modest living rooms |
| Installation difficulty | Beginner-friendly | Beginner-friendly |
| Typical investment | $50-300 | $80-400 |
| Dust collection | Minimal | Moderate (on decorative elements) |
| Bulb access | Easy — remove shade | Easy — typically open design |
Tools & Materials You'll Need
| Tool/Material | Purpose | Required/Optional |
|---|---|---|
| Voltage tester (non-contact) | Verify power is off before working | ★ Critical safety tool |
| Phillips screwdriver | Most fixture mounting screws | Required |
| Flathead screwdriver | Some terminal screws and prying | Required |
| Wire stripper | Stripping wire insulation if needed | Required |
| Pliers (needle-nose) | Bending wires, securing connections | Required |
| Wire nuts (assorted sizes) | Connecting wires safely | Required (often included with fixture) |
| Electrical tape | Wrapping wire nut connections | Recommended |
| Step ladder | Reaching ceiling height | Required |
| Safety glasses | Eye protection from debris | ★ Critical safety |
| Work gloves | Hand protection | Recommended |
| Smartphone (for photos) | Document existing wiring | Recommended |
| Flashlight or headlamp | Illumination after power off | Recommended |
| New flush mount fixture | The light itself | Required |
| LED bulbs (if not included) | 2700K-3000K warm white preferred | Required |
Choose a light that fits your room size and style. Picking the right ceiling light can make a meaningful difference in how your room looks and feels.
Cost & Time Estimate
| Element | Budget Range | Time Estimate |
|---|---|---|
| Basic flush mount fixture | $50-150 | — |
| Mid-range fixture | $150-300 | — |
| Designer/luxury fixture | $300-800+ | — |
| Basic tools (if needed) | $15-40 (voltage tester $10-15; wire stripper $8-15; screwdriver set $10-20) | — |
| LED bulbs (if not included) | $10-30 (2-3 bulbs typical) | — |
| Total DIY project cost | $75-350 typical | — |
| Professional electrician installation | $100-250 labor | 30-60 minutes |
| DIY installation time (beginner) | — | 45-90 minutes first install |
| DIY installation time (experienced) | — | 20-40 minutes |
| Junction box upgrade (if needed) | $15-30 box + $150-300 electrician labor | 30-60 minutes additional |
Safety Considerations
- Turn off power at circuit breaker. Wall switch alone doesn't disconnect all power — circuit breaker provides safe disconnection.
- Verify power off with voltage tester. Non-contact voltage tester ($10-15) confirms wires are not energized before contact.
- Tell household members of power-off work. Tape note on circuit breaker preventing accidental power restoration during work.
- Wear safety glasses. Protects eyes from falling debris and dust during ceiling work.
- Use proper step ladder rated for your weight. Don't use chairs, stools, or makeshift platforms.
- Two-person installation for heavy fixtures. Fixtures over 10 lbs benefit from second person holding while connecting.
- Don't touch bare wires. Even after power off, treat wires with caution.
- Verify junction box weight rating. Standard 50-lb rating; fixtures over this need brace box or structural mounting.
- Don't work in damp conditions. Damp/wet areas (bathrooms, kitchens near sinks) need damp/wet-rated fixtures and special procedures.
- When in doubt, consult a licensed electrician. Aluminum wiring, two-wire ungrounded systems, unfamiliar wire configurations require professional assistance.
10-Step Installation Process
-
Turn off the power at the circuit breaker.
Go to your circuit breaker panel; switch off the breaker controlling the room or specific circuit. Use a voltage tester at the wall switch and existing fixture wires to verify power is truly off. Tape note on circuit breaker preventing accidental power restoration.
-
Remove the existing fixture.
Unscrew mounting screws holding the existing fixture to the ceiling. Carefully lower the fixture, supporting its weight. Photograph the existing wiring before disconnecting — document wire color connections for reference. Unscrew wire nuts and separate connections. Lower fixture completely.
-
Inspect the junction box.
Check the existing junction box (also called electrical box or ceiling box) for damage, secure mounting, and weight rating. Standard plastic boxes rated 50 lbs; metal boxes typically 50 lbs unless marked higher. If your new fixture exceeds box weight rating, you need a brace box (50-75 lbs) or structural mounting upgrade before proceeding.
-
Install the new mounting bracket.
Your new flush mount fixture includes a mounting bracket (sometimes called crossbar or strap). Position the bracket across the junction box, aligning with the box's mounting holes. Secure with the screws provided. Ensure bracket is level and firmly attached.
-
Connect the ground wire first.
The ground wire — bare copper or green insulated — connects to the ground screw on the mounting bracket or to a green-marked wire from the fixture. Wrap the wire clockwise around the screw and tighten, or twist together and secure with wire nut.
-
Connect the neutral wires (white to white).
Strip 1/2 inch of insulation if not pre-stripped. Hold the two white wires parallel with ends aligned. Place a wire nut over the wire ends and twist clockwise until secure. Tug gently to verify connection. Wrap junction with electrical tape for additional security.
-
Connect the hot wires (black to black).
Repeat the connection process for the black hot wires. Strip if needed, align parallel, secure with wire nut, wrap with electrical tape. The hot wire carries current — verify it's connected to the fixture's black or marked-hot wire (some fixtures use ribbed insulation to denote neutral and smooth for hot).
-
Tuck wires into the junction box.
Gently fold the connected wires back into the junction box. Don't pinch wire insulation against sharp box edges. Wire nuts should be inside the box but not stressed by tight folding. Leave adequate slack for future fixture removal.
-
Mount the fixture to the bracket.
Align the fixture's mounting holes with the bracket's threaded studs or screw holes. Some fixtures slide onto threaded studs and secure with decorative cap nuts; others screw directly into the bracket. Tighten evenly to ensure fixture sits flush against the ceiling without gaps.
-
Install bulbs, shade, and restore power.
Install LED bulbs (2700K-3000K warm white recommended for residential rooms). Attach decorative shade, diffuser, or cover. Return to circuit breaker and switch power back on. Test the wall switch — light should activate. Verify even illumination and no flickering.
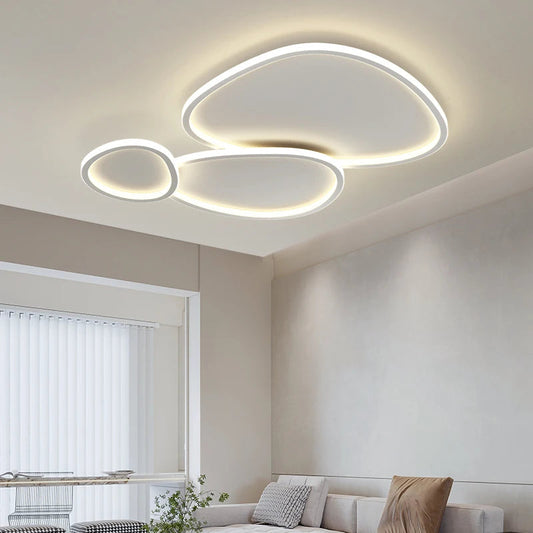
How to Install a Flush Mount Ceiling Light — Complete Guide
Flush mount ceiling light installation follows the standard 10-step process above with specific attention to fixture-specific mounting hardware. Key considerations for ceiling light installation:
- Confirm fixture weight against junction box rating. Standard ceiling boxes rated 50 lbs; verify before installation.
- Mounting bracket type varies by manufacturer. Crossbar mounts (most common), J-box mounts, and proprietary mounting systems each have specific procedures.
- Center alignment matters. Flush mount fixtures appear in center of room view — align with room geometry not just ceiling box position.
- Use canopy to hide mounting hardware. Decorative canopy covers junction box and bracket creating clean professional appearance.
- Verify level installation. Flush mount fixtures sit directly against ceiling — uneven ceiling or bracket creates visible gap. Use shims if needed.
- Test before final tightening. Restore power briefly to verify operation before final fixture tightening — easier to access wires if reconnection needed.
- For room-specific guidance: read our how to choose the right ceiling light for every room guide.
Ceiling Light Mounting Bracket Installation
The mounting bracket (also called crossbar, strap, or mounting plate) is the critical hardware connecting your fixture to the ceiling junction box. Proper bracket installation determines fixture stability and safety.
- Match bracket to junction box. Standard 4-inch round and octagonal junction boxes accept standard crossbar brackets; verify compatibility before installation.
- Crossbar bracket installation. Position crossbar across junction box face; align mounting holes with box screw holes; secure with screws (typically 8-32 thread size).
- Threaded stud configuration. Crossbar brackets typically have central threaded stud (1/8 IPS) accepting fixture's central mounting. Some brackets have multiple mounting holes for fixture-specific positioning.
- Ground screw on bracket. Most brackets include green ground screw accepting bare copper or green ground wire connection.
- Bracket weight rating. Standard brackets handle 50-lb fixtures; brace boxes accommodate 75-lb; structural mounting needed for heavier substantial fixtures.
- Level the bracket. Use small level on bracket; loosen and adjust screws if not level; tighten when level.
- Verify firm attachment. Wiggle test — bracket should not move; tighten screws if any movement detected.
- Don't overtighten on plastic boxes. Plastic boxes can crack with excessive torque; tighten until firm without forcing.
- Mounting bracket replacement. If existing bracket damaged or incompatible with new fixture, replace with new bracket matching new fixture specifications.
US Wire Color Codes
| Wire Color | Function | Connection | Safety Note |
|---|---|---|---|
| Black | Hot (line voltage) | Connect to fixture's black or smooth-insulated wire | Carries current — verify power off |
| White | Neutral | Connect to fixture's white or ribbed-insulated wire | Completes circuit |
| Green or Bare Copper | Ground | Connect to ground screw or fixture's green wire | Critical safety — never skip |
| Red | Secondary hot (3-way switches, fans) | Connect per circuit diagram | Consult electrician for 3-way circuits |
| Blue or Yellow | Switch leg or traveler wire | Connect per fixture instructions | Less common — verify with documentation |
- Standard US residential wiring uses black, white, and green/bare copper. Most flush mount installations involve only these three wires.
- Match like colors when possible. Black to black; white to white; green/bare to ground.
- Fixture wire identification. Some fixtures use ribbed insulation = neutral; smooth insulation = hot. Look for markings or trace from socket.
- Old wiring may not match standard colors. Pre-1960s homes may have non-standard colors; consult electrician for unclear configurations.
- Aluminum wiring requires special connectors. If you encounter aluminum wiring (common 1965-1973), use COPALUM or AlumiConn connectors — copper-to-aluminum requires expertise.
- Two-wire ungrounded systems. Older homes (pre-1960s) may lack ground wire; fixture installation possible but consult electrician for proper grounding solutions.
How to Install a Semi-Flush Mount Light
Semi-flush mount light installation follows the same 10-step process as flush mount with additional considerations for the hanging element.
- Same mounting bracket and wiring process. Junction box, mounting bracket, and wire connections follow standard ceiling light installation.
- Adjust hanging length if applicable. Some semi-flush mounts have adjustable rod or chain length; cut or shorten before final mounting if needed.
- Canopy covers mounting hardware. Decorative canopy at ceiling hides junction box and mounting bracket.
- Two-person installation recommended. Semi-flush fixtures often heavier and bulkier than flush mounts — second person holding while connecting reduces strain.
- Verify ceiling height clearance. Semi-flush mount drops 4-12 inches from ceiling; verify adequate headroom (typically 6'8" minimum clearance from floor to bottom of fixture).
- Best ceiling heights for semi-flush: 8-10 feet typical. Above 10 feet consider pendant or chandelier instead.
- Decorative element coordination. Semi-flush mounts often feature decorative shades, crystals, or designer elements — verify proper orientation and assembly.
- Browse our flush mount chandeliers collection for elegant semi-flush options.
How to Hang a Light Fixture (General Principles)
General light fixture hanging principles apply across flush mounts, semi-flush mounts, pendants, and chandeliers.
- Power off + voltage test. Universal first step for any light fixture work.
- Junction box weight rating verification. Match fixture weight to box rating (50 lbs standard; 75 lbs brace box; 100+ lbs structural mount).
- Mounting bracket compatibility. Match bracket to junction box and fixture mounting style.
- Wire matching (black-black, white-white, green-ground). Universal US residential color code.
- Wire nut + electrical tape on connections. Standard secure connection method.
- Tuck wires into junction box without pinching. Critical safety practice across all fixture types.
- Mount fixture aligned with room geometry. Center alignment, level installation, proper proportions.
- Test before final tightening. Verify operation before securing fixture permanently.
- Two-person installation for heavy fixtures. Over 10 lbs benefits from second person; over 25 lbs essential.
- For detailed chandelier installation: read our how to install a chandelier guide.
Beginner-Friendly DIY Tips
- Flush mount installation is genuinely beginner-friendly. Among the easiest electrical DIY projects — no complex circuits, single fixture, straightforward wiring.
- Choose fixture weighing under 20 lbs. Lighter fixtures easier to handle solo; reduces installation difficulty.
- Photograph existing wiring before disconnecting. Reference photos make new fixture wiring much simpler.
- Read fixture instructions completely before starting. Manufacturer instructions identify specific mounting requirements and parts.
- Lay out all parts before climbing ladder. Organized parts on table next to ladder reduces ladder trips.
- First-time installation takes 45-90 minutes. Don't rush; safety and accuracy more important than speed.
- Have second person ready (even if not helping). Someone to call electrician if needed; spotter on ladder.
- Practice wire nut technique on scrap wires. Brief practice eliminates anxiety during actual installation.
- If anything seems wrong, stop. Aluminum wiring, unfamiliar configurations, damaged components warrant professional help.
- Document your work. Take photos of new wiring for future reference if troubleshooting needed.
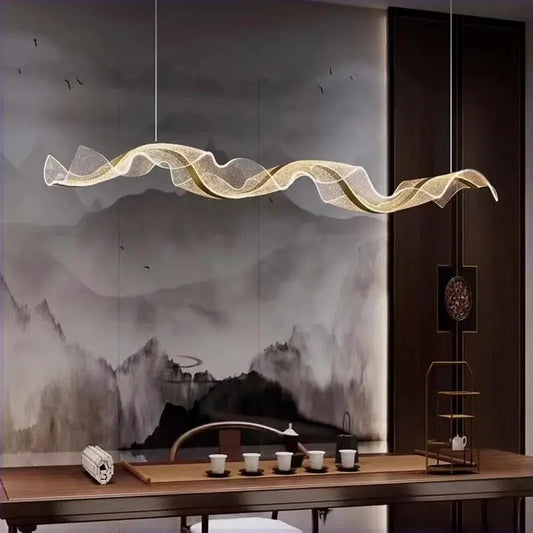
For broader fixture options, explore modern chandeliers that complement flush mount installations across rooms.
Troubleshooting Common Problems
| Problem | Likely Cause | Solution |
|---|---|---|
| Light doesn't work after install | Loose wire connection | Power off; verify all wire nuts secure; ensure bare wire fully covered |
| Light flickers | Loose bulb or connection | Tighten bulb; check wire nut connections; verify dimmer compatibility |
| Fixture not flush against ceiling | Mounting bracket not level | Loosen mounting bracket; level; retighten |
| Uneven ceiling gap | Ceiling not perfectly flat | Use mounting kit with adjustable canopy or shims |
| Light buzzes or hums | Incompatible dimmer | Verify LED-rated dimmer; replace with compatible dimmer |
| Light too dim | Insufficient lumens for room | Higher lumens bulbs; multiple fixtures; or larger fixture |
| Bulbs burn out quickly | Voltage spike; loose connection | Use surge protector circuit; verify connections; use LED bulbs |
| GFCI tripping | Ground fault or moisture | Verify proper grounding; check for moisture in damp areas |
| Wall switch doesn't control fixture | Wrong wire connections | Power off; verify hot wire connection to fixture's hot wire |
| Fixture won't fit junction box | Wrong box type or size | Verify standard 4-inch round/octagonal box; replace if needed |
Energy Efficiency & LED Bulbs
- LED bulbs preferred for flush mounts. 75-85% less energy than incandescent; 15,000-25,000+ hour lifespan; minimal heat generation.
- 2700K-3000K warm white: welcoming residential atmosphere across most rooms.
- 3500K-4000K cool white: kitchens, bathrooms, garages requiring task-focused brightness.
- CRI 90+ specification: accurate color rendering for artwork, paint, decor.
- Dimmable LED + LED-rated dimmer switches: atmospheric flexibility.
- Energy Star certification: verified efficiency claims.
- LED-integrated flush mounts: built-in LED arrays; entire fixture replaced when LED fails (50,000+ hour rating).
- Smart flush mounts: app + voice control; scene presets; geofencing automation.
- For supplier guidance: read our choosing a good LED supplier guide.
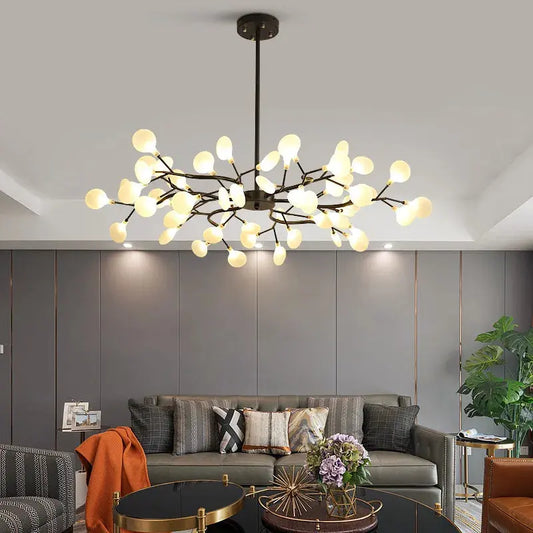
Seus Lighting's Flush Mount Collection
Seus Lighting offers extensive flush mount options across various styles. Popular categories include:
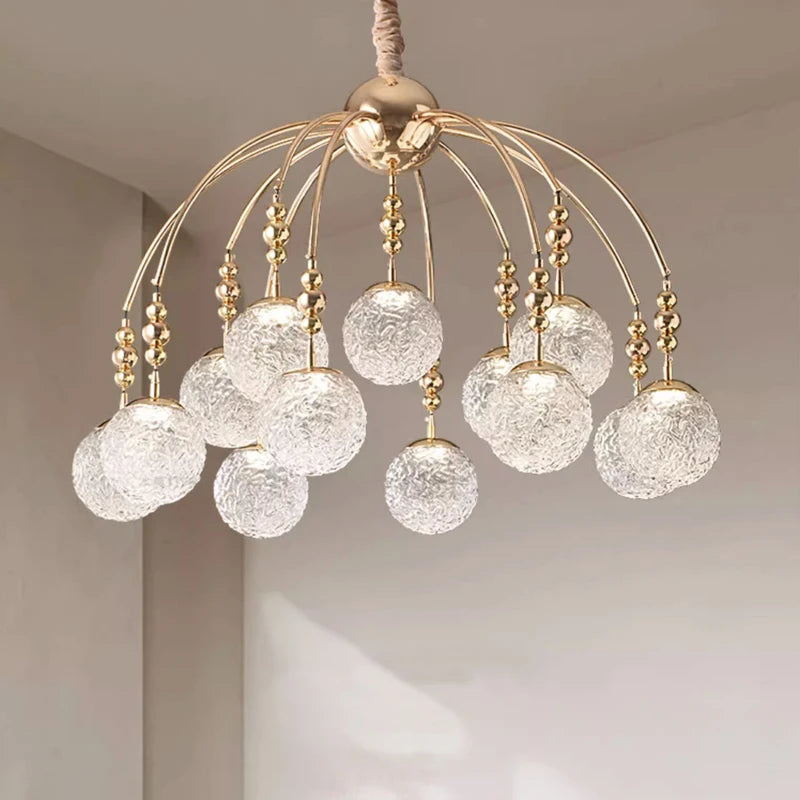
- Crystal flush mounts: elegant sparkle ideal for bedrooms, dining areas, formal spaces.
- Modern LED fixtures: sleek contemporary design for offices, modern living spaces.
- Glass shade lights: soft even lighting for living rooms, hallways, transitional spaces.
- Smart flush mounts: built-in WiFi connectivity, color changing capability, voice control.
- Drum shade flush mounts: clean cylindrical aesthetic across modern and transitional styles.
- Industrial cage flush mounts: exposed bulb aesthetic for industrial, farmhouse, urban styles.
Common Installation Mistakes
- Skipping voltage tester verification. Wall switch alone doesn't always disconnect all power. Always use voltage tester at fixture wires.
- Exceeding junction box weight rating. Standard 50-lb box can't safely support heavier fixtures. Upgrade to brace box (75 lbs) or structural mount (100+ lbs).
- Forgetting to connect ground wire. Ground wire (bare copper or green) is critical safety component — never skip.
- Loose wire nut connections. Wire nuts must be tight enough to hold securely; tug test after installation.
- Exposed bare wire outside wire nut. Wire nut should cover all bare wire ends — exposed bare wire creates shock and fire risk.
- Pinching wire insulation in junction box. Sharp box edges can cut insulation when wires forced into tight spaces.
- Wrong bulb wattage exceeding fixture rating. Each fixture has maximum wattage limit; exceeding creates fire hazard.
- Non-dimmable LEDs in dimmer circuits. Creates flicker, buzzing, or premature failure. Use dimmable LED + LED-rated dimmer.
- Working in damp/wet locations without rated fixture. Bathrooms near showers, kitchens near sinks need damp/wet-rated fixtures per US code.
- Not turning power back on at breaker. Final step — restore power at breaker to test fixture operation.
Browse Seus Lighting's flush mount and ceiling light collections — flush mount chandeliers for substantial style across rooms, ceiling lights for ambient illumination, all chandeliers for hanging alternatives, modern chandeliers for contemporary aesthetic, kitchen lighting for culinary spaces, bedroom lighting for relaxing atmosphere, bathroom lighting for grooming, foyer lighting for welcoming entries, and our custom service for unique requirements.
Flush Mount Chandeliers Ceiling Lights All Chandeliers Modern Chandeliers Kitchen Lighting Bedroom Lighting Bathroom Lighting Foyer Lighting Custom Service
Frequently Asked Questions
How do you install a flush mount light?
Install a flush mount light through 10 essential steps: (1) Turn off power at circuit breaker — verify with voltage tester before proceeding. (2) Remove existing fixture — unscrew mounting screws, photograph wiring, disconnect wires. (3) Inspect junction box — verify 50-lb weight rating; upgrade if heavier fixture. (4) Install new mounting bracket — secure to junction box; ensure level. (5) Connect ground wire first — bare copper or green to ground screw. (6) Connect neutral wires — white to white using wire nuts. (7) Connect hot wires — black to black using wire nuts; wrap with electrical tape. (8) Tuck wires into junction box — fold neatly without pinching insulation. (9) Mount fixture to bracket — align holes, secure with provided screws. (10) Install bulbs, shade, restore power — test operation. Time required: 30-60 minutes typical; 45-90 minutes for first-time installation. Cost: $50-300 fixture + $15-40 basic tools if needed. Difficulty: beginner-friendly with proper safety precautions. Critical safety: always turn off power at breaker (not just wall switch); verify with voltage tester; wear safety glasses; use proper step ladder. When to call electrician: aluminum wiring, two-wire ungrounded systems, junction box weight upgrades, unfamiliar wire configurations. Browse our flush mount chandeliers collection.
How do you install a flush mount ceiling light?
Flush mount ceiling light installation follows the 10-step DIY process with specific attention to ceiling-mounting hardware: (1) Power safety: turn off circuit breaker; verify with voltage tester. (2) Junction box inspection: confirm standard 4-inch round or octagonal box; verify 50-lb weight rating (upgrade to brace box for heavier fixtures). (3) Mounting bracket installation: secure crossbar bracket to junction box face; ensure level. (4) Wire connections (US standard colors): green/bare to ground screw; white to white (neutral); black to black (hot). Use wire nuts; wrap with electrical tape. (5) Wire tucking: fold connected wires gently into junction box without pinching insulation. (6) Fixture mounting: align fixture mounting holes with bracket threaded studs or screw holes; tighten evenly. (7) Verify flush installation: fixture should sit directly against ceiling without gaps. Use shims if ceiling uneven. (8) Install LED bulbs: 2700K-3000K warm white preferred for residential rooms. (9) Attach decorative shade or cover: per manufacturer instructions. (10) Restore power and test: switch breaker on; test wall switch; verify operation. Critical considerations: (1) Match fixture weight to junction box rating. (2) Center alignment with room geometry. (3) Use canopy to hide mounting hardware. (4) Test before final fixture tightening. (5) Match LED bulbs to fixture wattage rating.
How do you install ceiling light mounting bracket?
Ceiling light mounting bracket installation requires matching bracket to junction box and securing properly: (1) Identify junction box type: standard 4-inch round or octagonal box accepts standard crossbar brackets. Confirm compatibility before installation. (2) Position crossbar across junction box: align bracket mounting holes with junction box screw holes (typically two holes opposite sides). (3) Secure with provided screws: most brackets use 8-32 thread size screws; manufacturer typically provides correct screws. Tighten until firm but don't overtighten (especially on plastic boxes). (4) Level the bracket: use small bubble level on bracket face; loosen and adjust if not level; tighten when level. (5) Verify firm attachment: wiggle test — bracket should not move. Tighten further if any movement detected. (6) Identify threaded stud configuration: most brackets feature central threaded stud (1/8 IPS pipe thread size) for fixture central mounting. Some brackets have multiple mounting holes for fixture-specific positioning. (7) Ground screw location: most brackets include green ground screw accepting bare copper or green ground wire from house wiring. (8) Bracket weight rating considerations: standard brackets handle 50-lb fixtures; brace boxes accommodate 75 lbs; structural mounting needed for heavier substantial fixtures. (9) Don't overtighten on plastic junction boxes: plastic boxes can crack with excessive torque. (10) Replace damaged or incompatible brackets: if existing bracket damaged or doesn't match new fixture specifications, install new bracket matching new fixture mounting style. Common bracket types: crossbar (most common); J-box mount; threaded-stud mount; proprietary fixture-specific mounts.
How long does it take to install a flush mount ceiling light?
Flush mount ceiling light installation typically takes 30-60 minutes for standard installation: By experience level: (1) First-time DIY installation: 45-90 minutes. Includes time for reading instructions, identifying parts, and double-checking each step. (2) Experienced DIY installation: 20-40 minutes. Familiar with process and tools. (3) Professional electrician: 20-30 minutes typical. By installation complexity: (1) Simple flush mount swap (existing fixture replacement): 30-45 minutes. Same junction box, same circuit, standard wiring. (2) Semi-flush mount installation: 45-60 minutes. Additional decorative element assembly. (3) Junction box upgrade installation: 60-90 minutes. Includes box replacement before fixture installation. (4) New installation (no existing fixture): 60-120 minutes. May require ceiling drywall work; verify electrical capacity; consider electrician consultation. Factors increasing installation time: (1) Heavy fixture requiring brace box upgrade. (2) Aluminum wiring requiring special connectors. (3) Two-wire ungrounded systems needing grounding solution. (4) Multi-switch circuits (3-way, 4-way) requiring wire identification. (5) Damaged junction box requiring replacement. (6) Unfamiliar wire configurations or color codes. (7) Difficult access (high ceilings, tight spaces). Factors reducing installation time: (1) Fixture under 10 lbs (easier handling). (2) Familiar standard wiring. (3) Pre-existing properly rated junction box. (4) Two-person installation. (5) Organized tools and parts before starting. (6) Manufacturer-provided clear instructions.
How difficult is flush mount installation for a beginner?
Flush mount installation is genuinely beginner-friendly — one of the easiest electrical DIY projects with proper safety precautions: Why flush mount install suits beginners: (1) Simple wiring: typically only 3 wires (black hot, white neutral, green/bare ground). (2) Single fixture replacement: no complex circuit modification. (3) Standard hardware: most junction boxes and mounting brackets follow universal sizes. (4) Color-coded wiring: match like colors (black-black, white-white, green-ground). (5) Minimal tools required: voltage tester, screwdriver, wire stripper, pliers, ladder. (6) Universal step-by-step process: predictable 10-step installation across most flush mount fixtures. Difficulty considerations: (1) Power off safety: critical first step requires familiarity with circuit breaker panel and voltage tester. (2) Wire nut technique: proper tight connection requires brief practice. (3) Ladder work: comfortable ladder use important. (4) Weight handling: heavier fixtures (15+ lbs) benefit from two-person installation. Beginner-friendly tips: (1) Choose fixture under 20 lbs for easier solo handling. (2) Photograph existing wiring before disconnecting. (3) Read complete fixture instructions before starting. (4) Practice wire nut technique on scrap wires. (5) Lay out all parts before climbing ladder. (6) Have second person ready as spotter. (7) First installation takes 45-90 minutes — don't rush. When to call professional electrician: aluminum wiring (1965-1973 homes); two-wire ungrounded systems (pre-1960s); junction box weight upgrades; multi-switch circuits (3-way, 4-way); unfamiliar wire configurations; damaged ceiling drywall; ceiling fan-rated requirements; anything that seems wrong or unfamiliar.
How do you install a semi-flush mount light?
Semi-flush mount installation follows the same 10-step process as flush mount with additional considerations for hanging element: (1) Power safety: turn off circuit breaker; verify with voltage tester. (2) Junction box inspection: verify 50-lb rating; semi-flush fixtures often heavier than flush mounts — upgrade if needed. (3) Adjust hanging length if applicable: some semi-flush mounts have adjustable rod or chain — cut to desired length before final mounting. Verify floor-to-fixture-bottom clearance (6'8" minimum typical). (4) Mounting bracket installation: secure crossbar to junction box; ensure level. (5) Wire connections (US standard): green/bare to ground; white to white; black to black. Wire nuts + electrical tape. (6) Two-person installation recommended: semi-flush fixtures often heavier and bulkier — second person holds while connecting. (7) Mount canopy and fixture body: canopy covers junction box and mounting hardware; fixture body attaches via threaded stud or screw connection. (8) Install decorative elements: shade, crystals, decorative components per manufacturer instructions; verify proper orientation. (9) Install LED bulbs: 2700K-3000K warm white preferred. (10) Restore power and test: verify operation; check for flicker or buzz. Critical considerations: (1) Ceiling height clearance: semi-flush drops 4-12 inches; verify adequate headroom. (2) Best ceiling heights: 8-10 feet typical. Above 10 feet consider pendant or chandelier. (3) Two-person installation: especially for fixtures over 15 lbs. (4) Decorative orientation: shade and decorative elements must align correctly. (5) Weight on bracket: verify bracket rating matches fixture weight. Browse our flush mount chandeliers collection.
What tools do I need to install a flush mount ceiling light?
Essential tools for flush mount ceiling light installation: (1) Voltage tester (non-contact): $10-15. Critical safety tool. Confirms wires aren't energized before contact. Non-contact testers don't require touching bare wire. (2) Phillips screwdriver: most fixture mounting screws use Phillips head. (3) Flathead screwdriver: some terminal screws and prying applications. (4) Wire stripper: $8-15. Stripping wire insulation if not pre-stripped. Combination tools include multiple gauge slots. (5) Needle-nose pliers: bending wires, twisting connections, securing wire nuts. (6) Wire nuts (assorted sizes): connecting wires safely. Yellow nuts for 18-12 AWG; red for 18-10 AWG. Most fixtures include appropriate wire nuts. (7) Electrical tape: $3-5. Wrapping wire nut connections for additional security and insulation. (8) Step ladder: rated for your weight class. Choose ladder enabling comfortable working position at ceiling height. (9) Safety glasses: critical safety. Protects eyes from falling debris during ceiling work. (10) Work gloves: hand protection during wire handling. (11) Smartphone: photographing existing wiring before disconnection — reference for new installation. (12) Flashlight or headlamp: illumination after circuit breaker turned off. Headlamp keeps hands free. Optional tools that help: (1) Wire connectors organizer: keeps assorted wire nuts organized. (2) Voltage detector with audible alert: extra confirmation power is off. (3) Pocket level: ensuring bracket and fixture level. (4) Bracket extension if junction box recessed: special situation hardware. (5) Drywall anchors: if mounting bracket bypasses junction box (not recommended). Materials checklist: new flush mount fixture; LED bulbs (2700K-3000K warm white preferred); wire nuts (verify size); electrical tape; mounting hardware (typically included).
What is the difference between flush mount and semi-flush mount?
Flush mount and semi-flush mount fixtures differ in ceiling drop and aesthetic presence: Flush mount features: (1) Ceiling drop: 0 inches — fixture sits directly against ceiling with no gap. (2) Best ceiling heights: 7-8 feet (low to standard residential). (3) Room size: small to medium rooms. (4) Light distribution: even ambient illumination across room. (5) Decorative impact: minimal — clean modern aesthetic. (6) Best rooms: bedrooms, hallways, closets, low-ceiling kitchens, small bathrooms, mudrooms. (7) Investment range: $50-300 typical. (8) Dust collection: minimal due to ceiling-contact design. Semi-flush mount features: (1) Ceiling drop: 4-12 inches — fixture hangs slightly below ceiling. (2) Best ceiling heights: 8-10 feet (standard to taller residential). (3) Room size: medium to large rooms. (4) Light distribution: dimensional with subtle shadows creating depth. (5) Decorative impact: moderate — visible fixture body adds design interest. (6) Best rooms: dining rooms, foyers, modest living rooms, formal entryways, transitional spaces. (7) Investment range: $80-400 typical. (8) Dust collection: moderate on decorative elements. How to choose between flush vs semi-flush: (1) Ceiling height under 8 feet: choose flush mount. (2) Ceiling height 8-10 feet: either works; semi-flush adds decorative interest. (3) Ceiling height over 10 feet: consider pendant or chandelier instead. (4) Small space: flush mount preserves vertical visual space. (5) Need decorative statement: semi-flush provides moderate visual presence. (6) Want minimum dust accumulation: flush mount easier to maintain. (7) Specific styling needs: both available in modern, traditional, transitional, industrial, coastal styles.
Can I install a flush mount light myself?
Yes — most homeowners can safely install a flush mount light themselves with proper safety precautions and basic tools: DIY installation is appropriate when: (1) Standard residential wiring: modern home with copper wiring and 3-wire grounded system (black hot, white neutral, green/bare ground). (2) Fixture under 25 lbs: solo installation manageable. (3) Existing properly rated junction box: 50-lb standard box adequate for most flush mounts. (4) Single switch control: simple wall switch operation. (5) Replacing existing fixture: not new installation requiring drywall or circuit work. (6) Comfortable with basic electrical safety: familiar with circuit breaker panel and voltage tester. When to call licensed electrician: (1) Aluminum wiring (1965-1973 homes): requires special copper-to-aluminum connectors and expertise. (2) Two-wire ungrounded system (pre-1960s): lacks ground wire; needs proper grounding solution. (3) Junction box weight upgrade: brace box installation or structural mounting. (4) Heavy fixtures (over 50 lbs): structural mounting consideration. (5) Multi-switch circuits (3-way, 4-way): complex wire identification required. (6) Damaged ceiling drywall or junction box: repair work needed before installation. (7) New installation (no existing fixture): may require new circuit, drywall work, code inspection. (8) Ceiling fan-rated requirements: special brace box installation. (9) Unfamiliar wire configurations: anything not standard 3-wire grounded. (10) You feel uncertain or unsafe: better to call professional than risk electrical accident. Cost comparison: DIY installation $75-350 (fixture + basic tools); professional installation $200-550 (fixture + $100-250 labor). Time investment for first DIY installation: 45-90 minutes including learning curve.
Do I need to turn off power to install a flush mount light?
Yes — absolutely yes. Turning off power is the most critical safety step in flush mount light installation: Why turning off power is non-negotiable: (1) Electrical shock risk: live electrical wires can cause serious injury or death. Even 120V residential wiring can be fatal under certain conditions. (2) Equipment damage: live wires touching metal fixture components can damage fixture, junction box, or create short circuits. (3) Fire risk: improper wire handling on energized circuits can spark or arc, creating fire hazard. (4) Code requirement: US electrical code requires power off for all wiring work. How to turn off power correctly: (1) Go to circuit breaker panel: identify breaker controlling the room or specific fixture circuit. (2) Switch breaker to OFF position: not just dim — fully off. (3) Use voltage tester at fixture: confirm wires aren't energized before touching. Non-contact voltage tester ($10-15) is essential safety tool. (4) Test at wall switch first: wall switch should not activate lights (confirms power off). (5) Tape note on circuit breaker: prevents accidental power restoration during work. (6) Inform household members: ensure no one restores power during installation. Why wall switch alone is insufficient: (1) Wall switch only interrupts power flow to fixture — doesn't disconnect wires from circuit. (2) Some wires (constant hot for traveler circuits, smart switch power) remain energized even with wall switch off. (3) Wall switch could fail and reconnect circuit unexpectedly. (4) Wall switches sometimes wired incorrectly (interrupting neutral instead of hot) — circuit still energized despite switch off appearance. Voltage tester procedure: (1) Hold voltage tester within 1/2 inch of wire being tested. (2) Tester beeps or lights up if voltage detected. (3) Test all wires before contact — even wires you expect to be off. (4) Verify tester working by testing known energized circuit first. Critical reminder: when in doubt about power status, don't proceed. Treat all wires as energized until verified safe.
What weight can a standard ceiling box hold?
Standard residential ceiling junction boxes have specific weight ratings determining fixture installation safety: (1) Standard plastic ceiling box: 50 lbs typical rating. Suitable for most flush mount fixtures, semi-flush mounts, modest pendants, and smaller chandeliers. (2) Standard metal ceiling box: 50 lbs typical unless marked higher. Some heavy-duty metal boxes rated 70-75 lbs. (3) Ceiling fan-rated box (brace box): 50-75 lbs typical. Required for ceiling fans regardless of fan weight. Suitable for moderate chandeliers and pendants. (4) Heavy-duty brace box: 75-100 lbs. Suitable for substantial chandeliers, large pendants, heavy fixtures. (5) Structural mounting: 100+ lbs. Required for very heavy substantial chandeliers; involves mounting plate or strap directly to structural ceiling members. How to identify your junction box rating: (1) Visible markings: most boxes have weight rating molded or stamped into box. (2) Box type identification: plastic boxes typically 50 lbs; metal boxes 50 lbs+ depending on construction; brace boxes have visible cross-brace for ceiling fan support. (3) Manufacturer documentation: consult box manufacturer specifications if uncertain. Weight rating considerations: (1) Match fixture weight to box rating with margin: don't install 45-lb fixture in 50-lb-rated box — leave safety margin. (2) Include all fixture components in weight: chandelier with crystals, decorative elements, multiple bulbs adds up. (3) Dynamic load considerations: ceiling fans require fan-rated brace box due to motion stress beyond static weight. (4) Box mounting type matters: pancake boxes (very shallow) typically lower weight ratings; full-depth boxes typically 50 lbs+. When to upgrade junction box: (1) Fixture exceeds existing box rating: install brace box or heavy-duty mounting. (2) Damaged or loose existing box: replace before installing new fixture. (3) Converting from light fixture to ceiling fan: requires fan-rated brace box. (4) Adding very heavy substantial chandelier: structural mounting solution. (5) Renovation revealing inadequate box: upgrade during renovation. Upgrade cost: brace box $15-30 (material); professional electrician installation $150-300 for box replacement; structural mounting $200-500+ for substantial chandelier support.
What size flush mount light do I need?
Flush mount light sizing depends on room dimensions and ceiling height: By room size (sq ft): (1) Small room (under 75 sq ft): 12-15" diameter flush mount. Typical bedroom, closet, small bathroom. (2) Medium room (75-150 sq ft): 15-20" diameter flush mount. Standard bedroom, hallway, medium bathroom, dining nook. (3) Large room (150-225 sq ft): 20-24" diameter flush mount. Larger bedroom, modest living room, dining room. (4) Substantial room (225+ sq ft): 24-30"+ diameter flush mount or consider multiple fixtures or chandelier. By L+W formula: total room length (ft) + room width (ft) = ideal fixture diameter in inches. Example: 10' × 12' room = 22" diameter flush mount. By ceiling height: (1) 7-8 ft ceiling: flush mount strongly preferred over semi-flush. (2) 8-9 ft ceiling: either flush or semi-flush works. (3) 9-10 ft ceiling: semi-flush mount adds desirable decorative presence. (4) 10+ ft ceiling: consider pendant or chandelier instead. Lumens requirements by room: total flush mount lumens should match room lighting requirements: (1) Bedroom: 1,500-3,000 lumens (15-25 per sq ft). (2) Living room: 2,000-4,000 lumens (20-30 per sq ft). (3) Kitchen: 4,000-8,000 lumens (30-40 per sq ft). (4) Bathroom: 4,000-8,000 lumens (50-70 per sq ft). (5) Hallway: 800-2,000 lumens (20-30 per sq ft). (6) Foyer: 800-10,000+ lumens depending on space size. Bulb count considerations: most flush mounts have 1-4 bulb sockets; total lumens = bulb count × individual bulb lumens. Style considerations: (1) Modern minimalist: simple drum shade or clean geometric form. (2) Traditional: bowl or dome shape with decorative trim. (3) Industrial: cage style with exposed Edison bulbs. (4) Coastal: natural materials, rattan or jute shades. (5) Designer luxury: crystal, beaded, or designer-brand statement pieces.
Wrapping Up
Installing a flush mount ceiling light is a manageable DIY project — following the 10-step process with proper safety precautions delivers professional-quality results in 30-60 minutes. Turn off power at the circuit breaker and verify with voltage tester before any work, match fixture weight to junction box rating, connect ground wire first followed by neutral and hot wires using wire nuts wrapped with electrical tape, and test the fixture before final tightening. If you encounter aluminum wiring, two-wire ungrounded systems, or anything unfamiliar, stop and consult a licensed electrician — safety and professional results both matter.
For more flush mount style options, browse our Seus Lighting flush mount collection featuring styles from minimalist modern through elaborate crystal designs to suit any room.


