

A glass chandelier loses its brightness gradually enough that most owners don't notice until the cleaning is done — dust and airborne residue can dim a fixture's light output noticeably while making the glass look merely "fine." This guide covers the whole job properly: the right cleaning solution and why it works, the choice between cleaning in place and taking the glass down, streak-free drying, and fixes for cloudy panels, water spots, and stubborn film.
First: Is It Glass or Crystal?
The answer changes how you clean, so it's worth thirty seconds to check. Crystal is glass with mineral content added specifically to increase its refraction — it sparkles harder, rings when tapped (a clear sustained tone versus glass's dull clink), feels heavier for its size, and often shows sharp prism-cut facets. Ordinary glass elements are lighter, smoother-edged, and glow rather than sparkle.
Practically, glass is the more forgiving material: it tolerates the standard alcohol-and-water solution, gentle handling, and ordinary microfiber cloths without complaint. Crystal rewards more careful technique and has a few extra rules around handling and drying. This guide covers glass; if your fixture turns out to be crystal, the crystal chandelier cleaning guide covers its specific requirements, and if you're unsure which you own, crystal vs. glass chandeliers walks through the differences in detail.
Why the Cleaning Solution Matters
Most streaks and film on chandelier glass aren't dirt you failed to remove — they're residue your cleaner left behind. Understanding two ingredients prevents nearly all of it.
Distilled water, not tap. Tap water carries dissolved minerals — calcium and magnesium mostly — and when the water evaporates off the glass, those minerals stay behind as the white haze known as water spots. Distilled water has had the minerals removed, so it evaporates clean. In hard-water regions this single substitution changes the result more than any technique adjustment.
Isopropyl alcohol, in moderation. Alcohol does two jobs: it cuts the light grease film that settles on household glass (cooking aerosols travel remarkably far), and it speeds evaporation so the solution doesn't sit long enough to leave marks. A 1:4 ratio with distilled water is strong enough to work and mild enough for lacquered metal frames and painted finishes nearby.
The Standard Glass Solution
1 part isopropyl alcohol + 4 parts distilled water, in a clean spray bottle. For example: ½ cup (4 fl oz / 120 ml) alcohol to 2 cups (16 fl oz / 475 ml) distilled water. A single drop of clear dish soap may be added for kitchen fixtures with heavier grease — one drop, no more, or the soap itself becomes the streak.
Just as important is what to leave out. Ammonia-based glass cleaners can dull lacquered brass and painted frame finishes over repeated use. Vinegar works on glass but its acidity is unkind to some metal platings, so keep it off the frame. Abrasives — powdered cleansers, magic erasers, rough paper towels — put fine scratches in glass that scatter light permanently. And paper towels in general shed lint that clings to freshly cleaned glass; lint-free microfiber is the right tool everywhere in this job.
Setting Up Safely
⚠️ Before anything touches the fixture
Switch the circuit off at the breaker — not just the wall switch, which can leave the fixture live depending on the wiring — and confirm with a non-contact voltage tester if you have one. Let the bulbs cool completely. Damp cloth plus warm bulb is how bulbs crack.
Gather everything before climbing: a stable step ladder tall enough that you're not reaching overhead at full stretch, a drop cloth or folded blanket under the fixture to catch anything that slips, the spray solution, at least two lint-free microfiber cloths (one damp-work, one dry-buff), a soft-bristled brush or clean paintbrush for crevices, and cotton gloves or clean bare hands — fingerprints on just-cleaned glass are the most common way this job ends in frustration.
Take a photo of the fixture from a couple of angles before you start. If any glass comes off, the photo settles every "which piece went where" question during reassembly. For larger fixtures a helper is genuinely useful — one person on the ladder, one handing cloths and receiving glass pieces.
Two Ways to Do the Job
Every glass chandelier cleaning comes down to a choice: clean the glass where it hangs, or take it down and wash it. The right answer depends on how dirty the fixture actually is.
The Glass-On Method (Routine Cleaning)
This is the standard once-or-twice-yearly clean, done with everything in place.
- Dry dust first, top to bottom. A microfiber cloth or soft duster removes the loose layer before anything gets damp. Skipping this step turns dust into smeared mud the moment the wet cloth arrives. Top to bottom matters because dislodged dust falls — work downward and you never re-dirty a finished section.
- Spray the cloth, not the chandelier. Spraying the fixture directly sends solution into bulb sockets and wiring connections — the one genuinely damaging mistake in this job. Dampen the cloth until it's moist but not dripping.
- Wipe each glass element individually. Support the piece lightly with one hand while wiping with the other, so no element takes sideways pressure at its mounting point. Refold the cloth to a clean face often; a saturated cloth stops cleaning and starts redistributing.
- Buff dry immediately with the second cloth. Drying each piece right after wiping — rather than wiping everything and drying at the end — is what produces the streak-free result. Solution that air-dries leaves marks; solution that's buffed off doesn't.
- Detail the tight spots. A soft brush or cotton swab handles the joints where glass meets frame — the crevices where dust shows most against clean surroundings.
- Finish with the frame and bulbs. Wipe metal arms with a barely damp cloth and dry them, and give cooled bulbs a dry wipe — a dusty bulb costs a surprising amount of light output.
The Glass-Off Method (Deep Cleaning)
When the test wipe smears rather than dusts — typical for kitchen-adjacent fixtures and anything that's gone several years — removal cleans better than any amount of in-place wiping, because you can wash the inside surfaces and seams that a cloth on a ladder never reaches.
- Photograph everything first, including close-ups of how pieces attach. Reassembly confidence is worth the two minutes.
- Remove glass pieces one at a time and carry them down individually or in a towel-lined container — never stacked against each other.
- Wash at the sink in warm water with a drop of dish soap, in a basin lined with a folded towel so a slip lands soft. Wash one piece at a time; two glass pieces in the same water eventually find each other.
- Rinse with distilled water. A tap rinse undoes the effort in hard-water areas — a final pour or dip of distilled water is what leaves the glass spot-free.
- Dry completely with lint-free cloths before anything goes back up. Trapped moisture at mounting points invites mineral marks and, over time, corrosion at the metal contact.
- Clean the empty frame while access is easy — the damp-wipe-then-dry routine, plus the brush for ornament crevices.
- Reassemble against your photos, seating each piece fully and checking that nothing hangs loose or contacts a neighbor.
Cleaning by Glass Type
Clear Glass Shades and Panels
The standard method as written. Clear glass shows streaks most honestly, so the spray-cloth-and-immediate-buff discipline matters here more than anywhere.
Frosted and Seeded Glass
The matte surface of frosted glass hides streaks but holds onto grease film; give these pieces a slightly damper wipe and expect to refold the cloth more often. Seeded glass — with its intentional bubbles and texture — collects dust in its dimples; the soft brush before wiping does most of the work.
Colored and Smoked Glass
Dark and tinted glass shows fingerprints and lint more than clear glass shows streaks. Handle by the edges, use circular buffing strokes, and finish each piece with a completely dry cloth pass. For a stubborn print, breathing a light fog onto the glass and buffing immediately works better than more solution.
Glass Globes and Bubbles
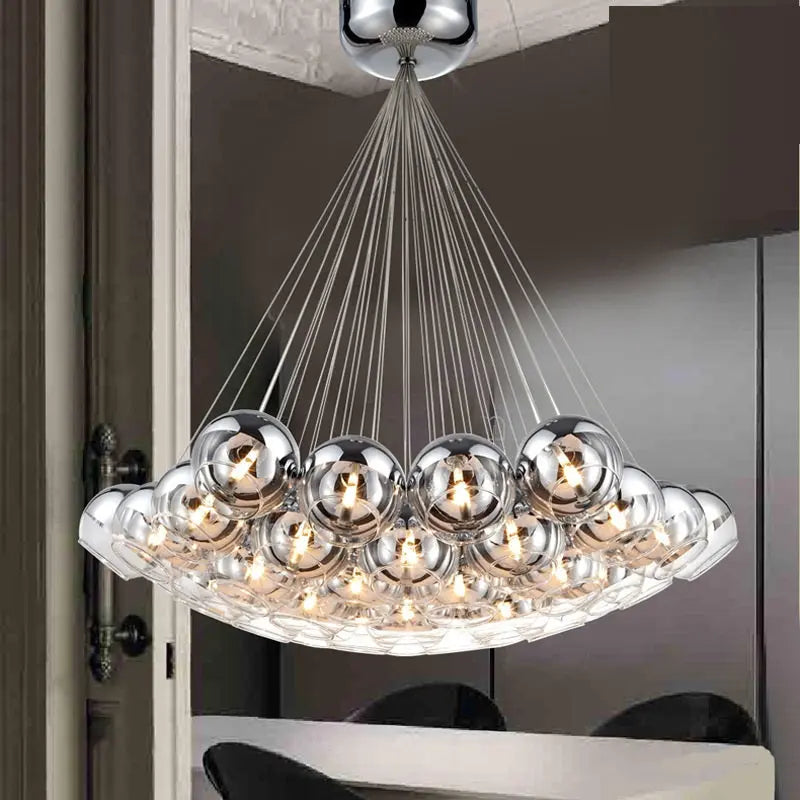
Spherical elements need their weight supported while being wiped — cup the globe in one palm and clean with the other, so the mounting stem never takes lateral force. Work one globe at a time and resist the urge to reach through the cluster; hands brushing past cleaned globes is how fingerprints multiply. Bubble fixtures have enough of their own quirks — finish care, connection checks, layout-specific access — that they earn a dedicated guide: how to clean and maintain a bubble chandelier.
Mixed Glass-and-Crystal Fixtures

Many fixtures combine glass shades with crystal accents. Clean the glass elements as described here, and give the crystal components the gentler treatment they prefer — the crystal cleaning guide covers handling, solutions, and the drip-dry techniques specific to cut crystal. Fixtures from the crystal chandelier collection generally fall on that side of the line.
Getting a Streak-Free Finish
Streaks have exactly three causes, and each has a fix:
- Mineral residue — from tap water in the mix or a tap rinse. Fix: distilled water, start to finish.
- Solution left to air-dry — evaporation concentrates whatever's dissolved and deposits it. Fix: buff each piece dry immediately after wiping, not at the end.
- A dirty or saturated cloth — past a point, the cloth deposits more than it lifts. Fix: refold to clean faces constantly and swap cloths without hesitation; two or three cloths per fixture is normal.
One habit-level tip: clean on a dry day if you can. High humidity slows evaporation and extends the window in which un-buffed solution can mark the glass.
Troubleshooting Specific Problems
| Problem | What's Happening | Fix |
|---|---|---|
| White haze / water spots | Mineral deposits from tap water or hard-water humidity | Wipe with distilled water on a soft cloth; for set-in spots, a 1:3 white vinegar and distilled water mix on the cloth — kept strictly off the metal frame — then rinse-wipe and buff dry |
| Cloudy film that returns | Grease film, usually kitchen aerosols | Glass-off wash with warm water and a drop of dish soap; in-place wiping thins the film but rarely removes it |
| Streaks after cleaning | Residue from the process itself | Re-wipe with plain distilled water and buff immediately; check the three causes above |
| Lint on the glass | Paper towels or a shedding cloth | Switch to lint-free microfiber; a final dry buff picks up what's there |
| Dull or tarnished frame | Metal finish aging, not a glass issue | Use a cleaner matched to that specific finish, tested on a hidden spot; never let metal polish touch the glass edges |
| Permanent-looking scratches | Past abrasive cleaning | Not reversible at home; prevention (no abrasives, ever) is the only cure — badly scratched shades can often be replaced individually |
Keeping It Clean Between Deep Cleans
A monthly two-minute pass with a dry extendable microfiber duster keeps the dust layer from consolidating into film, which stretches the interval between real cleanings considerably. Wipe fingerprints when they happen rather than letting them bake under warm bulbs. And two environmental notes that matter more than they sound: kitchen fixtures stay cleaner when the range hood actually gets used, and windows opened on dusty, windy days deposit a visible layer surprisingly fast.
As a schedule: monthly dry dusting, a proper glass-on clean once or twice a year, and a glass-off deep clean when the test wipe smears — every two to three years for most rooms, yearly for fixtures near a kitchen. Bathroom fixtures, living with humidity and product aerosols, appreciate the more frequent end of those ranges; the same rhythm serves fixtures anywhere from the bathroom to the bedroom.
When Not to Do It Yourself
Some situations shift the answer to a professional or to a different guide:
- High and two-story installations. Fixtures above comfortable ladder height involve equipment and technique beyond a routine clean — in-place methods, lift systems, and safety setups are covered in the high ceiling chandelier cleaning and maintenance guide.
- Antique or valuable fixtures, where original finishes and irreplaceable glass justify professional hands.
- Anything structurally loose — a wobbling arm or slipping canopy is an electrician visit first, a cleaning second.
- Discomfort on ladders, full stop. A professional cleaning costs far less than a fall.
If the fixture is past its best despite the effort, the range runs from everyday glass to statement pieces.
All Chandeliers Crystal Chandeliers Bubble Chandeliers Ceiling Lights
Frequently Asked Questions
What is the best way to clean a glass chandelier?
Cut power at the breaker, dust the fixture dry from top to bottom, then wipe each glass element with a lint-free cloth dampened with one part isopropyl alcohol to four parts distilled water — spraying the cloth, never the fixture — and buff each piece dry immediately with a second cloth. That immediate buffing, plus distilled rather than tap water, is what separates a streak-free result from a hazy one. Lightly soiled fixtures clean fine this way in place; greasy or long-neglected glass cleans better removed and washed at a sink.
How do you clean a chandelier without taking it down?
The glass-on method: dry-dust first with a microfiber cloth or soft duster, working top to bottom, then wipe each element with a solution-dampened lint-free cloth and dry it immediately. Support each piece with one hand while wiping with the other so mounting points take no sideways force, and use a soft brush for the crevices where glass meets frame. This handles routine dust and light film well. Its limit is grease and interior surfaces — if a test wipe smears rather than lifting gray dust, in-place cleaning will thin the film but not remove it, and the glass should come down for a sink wash.
What is the best homemade chandelier cleaner?
One part isopropyl alcohol to four parts distilled water, in a clean spray bottle — for example, half a cup of alcohol to two cups of distilled water. The alcohol cuts household grease film and speeds evaporation; the distilled water evaporates without leaving mineral spots the way tap water does. For kitchen fixtures with heavier grease, a single drop of clear dish soap can be added. Avoid ammonia cleaners (hard on lacquered and painted frame finishes), keep vinegar off metal parts, and never use anything abrasive on the glass.
Can I use Windex on a glass chandelier?
On the glass itself, an ammonia-based cleaner will clean — but overspray and drips reach the frame, and repeated ammonia exposure dulls lacquered brass, painted, and some plated finishes over time. Since a chandelier is mostly frame from a drip's point of view, the safer routine is the alcohol-and-distilled-water mix applied to a cloth. If you do use a commercial glass cleaner, spray it onto the cloth away from the fixture and keep it strictly off metal, sockets, and wiring.
How often should a glass chandelier be cleaned?
A proper wet clean once or twice a year suits most rooms, supported by a quick monthly pass with a dry extendable duster that stops dust consolidating into film. Location moves the schedule: fixtures in or near kitchens collect grease aerosols and benefit from twice-yearly cleaning plus a periodic glass-off wash, bathroom fixtures live with humidity and deserve the frequent end of the range, and bedroom or formal-room fixtures can often stretch toward once a year. The honest indicator is a test wipe — gray dust means routine cleaning; smear means it's overdue.
How do you remove cloudiness from chandelier glass?
Diagnose it first with a fingertip. If the cloudiness wipes to a smear, it's grease film — remove the glass and wash it in warm water with a drop of dish soap, then rinse with distilled water and dry. If it doesn't smear and looks like white haze, it's mineral deposit — wipe with a 1:3 mix of white vinegar and distilled water on a cloth (kept off the metal frame), then rinse-wipe with plain distilled water and buff dry. If neither treatment changes it, the surface is likely etched or scratched from past abrasive cleaning, which isn't reversible at home — though individual shades can often be replaced.
Is cleaning glass different from cleaning crystal?
The chemistry is similar but the care level differs. Glass tolerates the standard alcohol-and-water routine, ordinary microfiber, and reasonably brisk handling. Crystal — glass with mineral content added for refraction — is typically heavier, hangs from finer attachments, and shows every fingerprint on its cut facets, so it calls for gentler handling, glove use, and its own drying techniques. If your fixture rings with a sustained tone when tapped and sparkles with rainbow flashes, treat it as crystal and follow the crystal cleaning guide; if it clinks dully and glows rather than sparkles, the methods on this page are right.
How do you clean a chandelier on a high ceiling?
Above comfortable step-ladder height, the job changes character: it involves extension equipment, in-place techniques designed for minimal handling, and in two-story installations sometimes a lift system or scaffold — plus a real fall-safety setup. Those methods, including how to clean effectively without lowering the fixture and when a motorized lift earns its cost, are covered in the dedicated high ceiling chandelier maintenance guide. For anything beyond your comfortable, three-points-of-contact ladder reach, that guide or a professional service is the right next step.
What should you put under a chandelier when cleaning it?
A drop cloth, folded blanket, or thick towels spread across the floor and any furniture directly beneath the fixture. The padding does two jobs: it gives a slipped glass element a soft landing instead of a shattering one, and it catches drips and dust so the room doesn't need a second cleaning afterward. If the chandelier hangs over a dining table, pad the tabletop generously — it's the most likely landing zone and usually the most scratchable surface in the room.
Why does my chandelier glass streak no matter what I do?
Streaks come from residue, and residue has three sources: minerals in tap water (switch every drop in the process to distilled), solution left to evaporate on the glass (buff each piece dry immediately after wiping it, not at the end of the job), and a saturated cloth that's depositing instead of lifting (refold constantly and use two or three cloths per fixture). Fix all three and streaks essentially stop. If marks persist even with plain distilled water, look closely in raking light — permanent etching from past abrasive or harsh chemical cleaning can mimic streaking.
Wrapping Up
Clean glass is mostly a matter of getting three details right: a mineral-free solution (distilled water, modest alcohol), the spray-the-cloth discipline that keeps liquid out of the electrics, and immediate buff-drying so nothing evaporates on the glass. Choose glass-on for routine care and glass-off when a test wipe smears, and the fixture rewards you with noticeably more light than it gave before.
For crystal elements, the crystal cleaning guide picks up where this one stops; for fixtures out of ladder reach, the high ceiling maintenance guide covers the equipment and technique. And if the cleaning reveals a fixture past saving, the chandelier collection is where the replacement search starts.


